Add/Remove skills of staff members
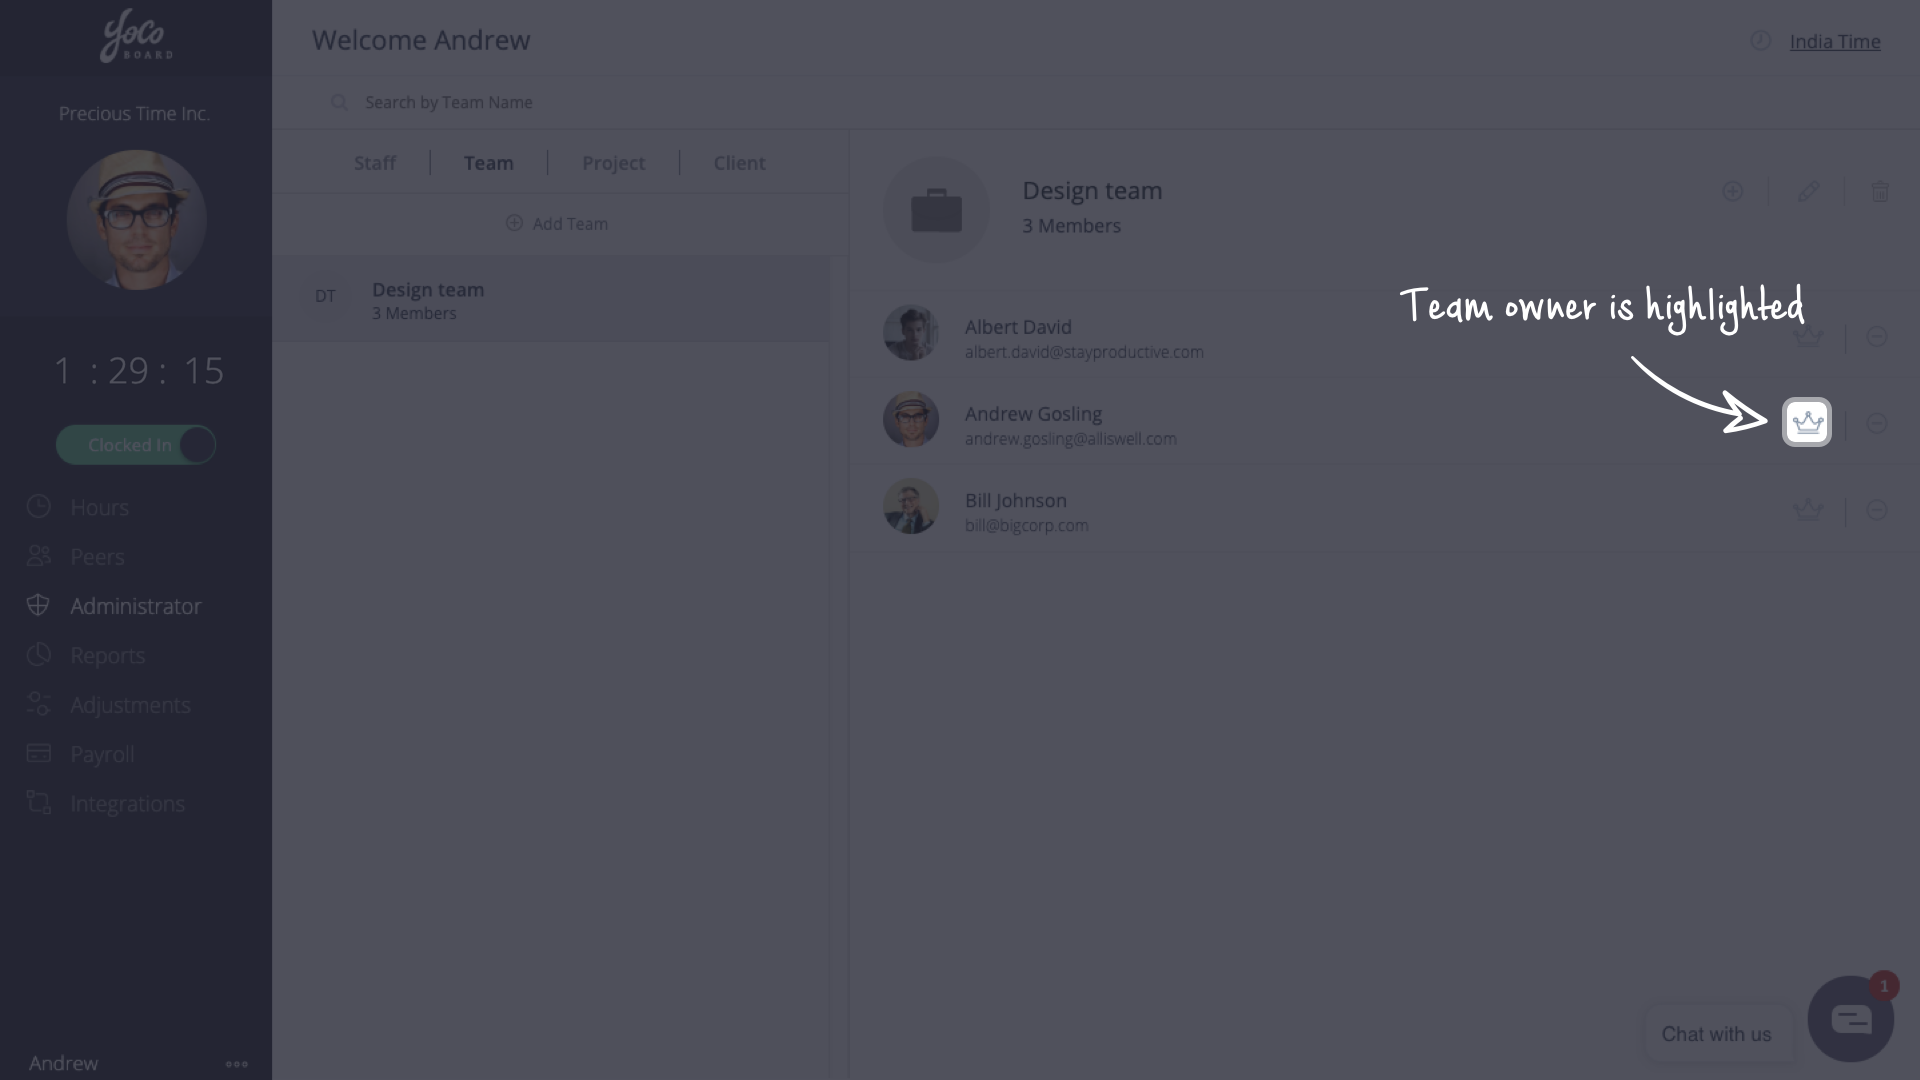
Delegate additional responsibility to your staff members by increasing their skill-set. If the staff member is a Team Owner, increasing their skill-set will let them view and edit reports, confirm hours and force clock out the team members.
Changing the role of a staff member to Admin will not have any effect on that member’s skill-set. Only a Super Admin/Admin can change a staff member’s skill-set.
1.1 Changing the staff skill-set
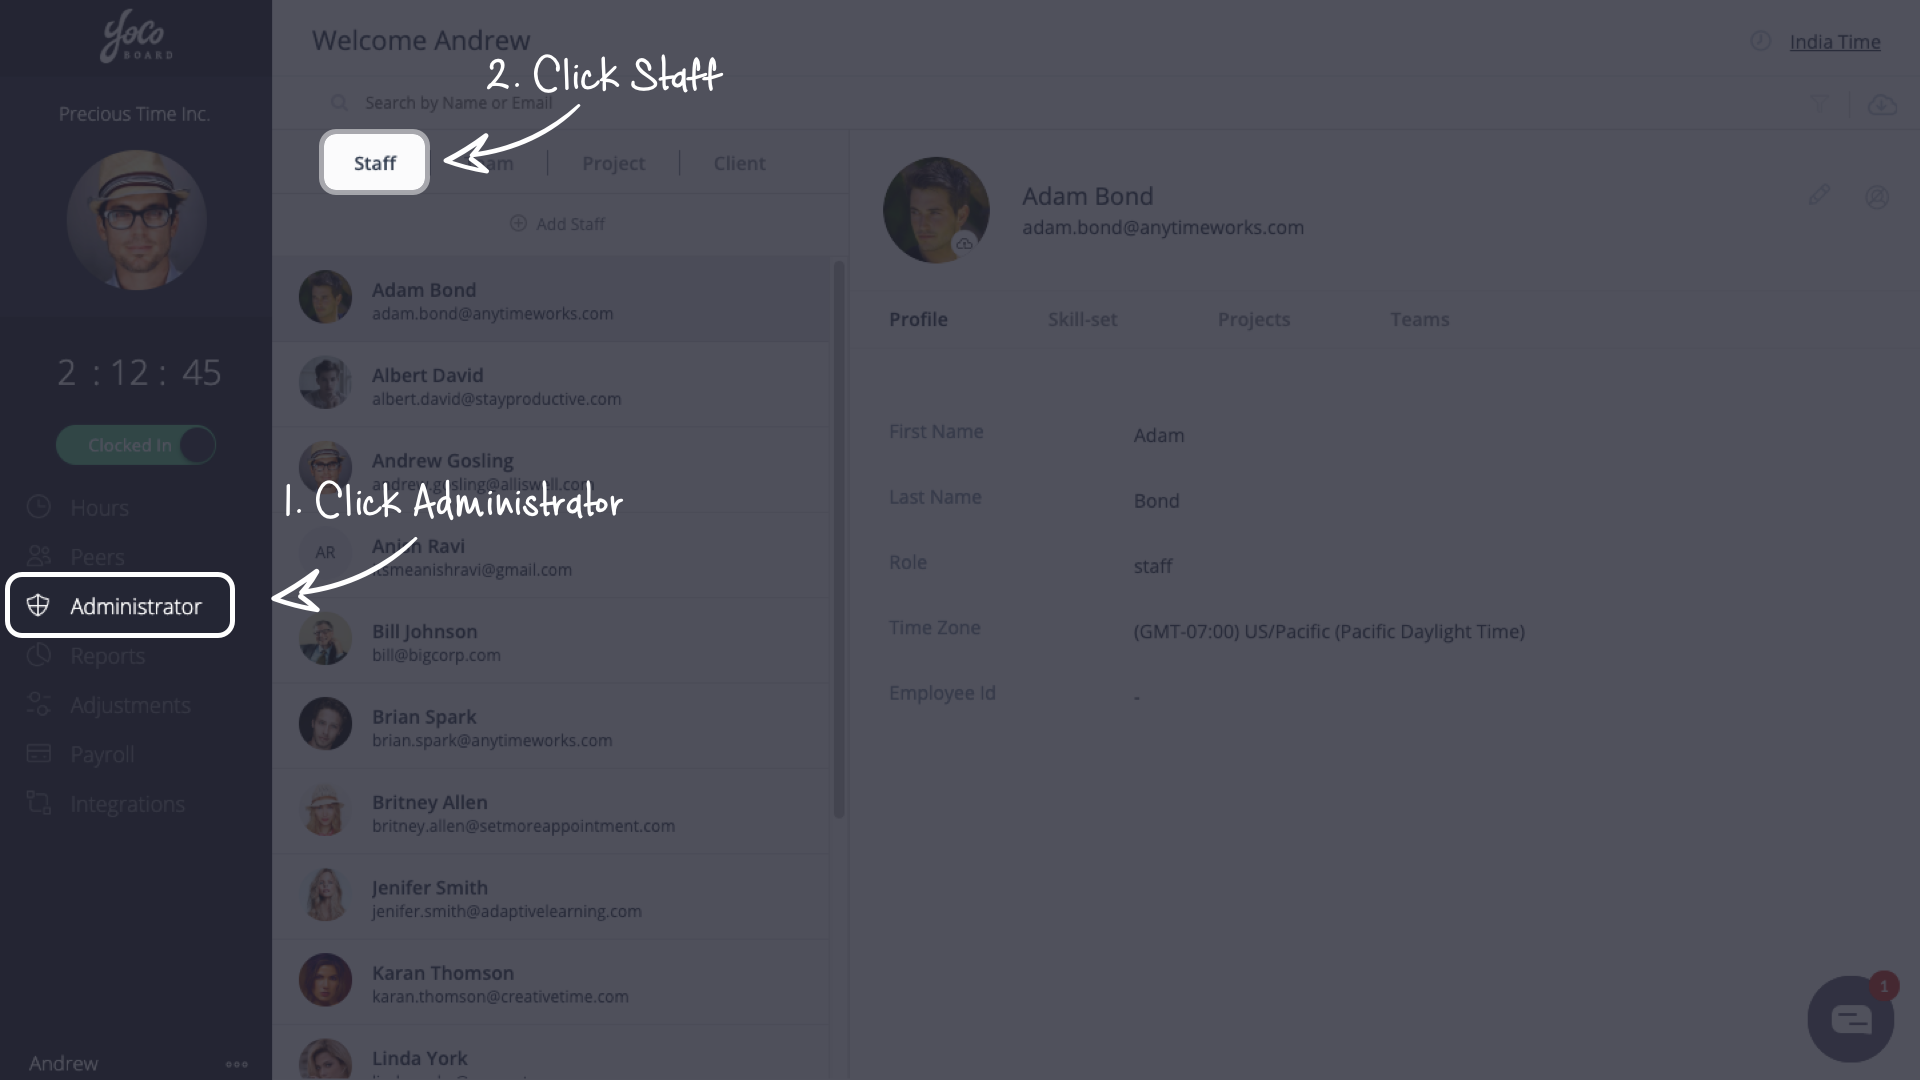
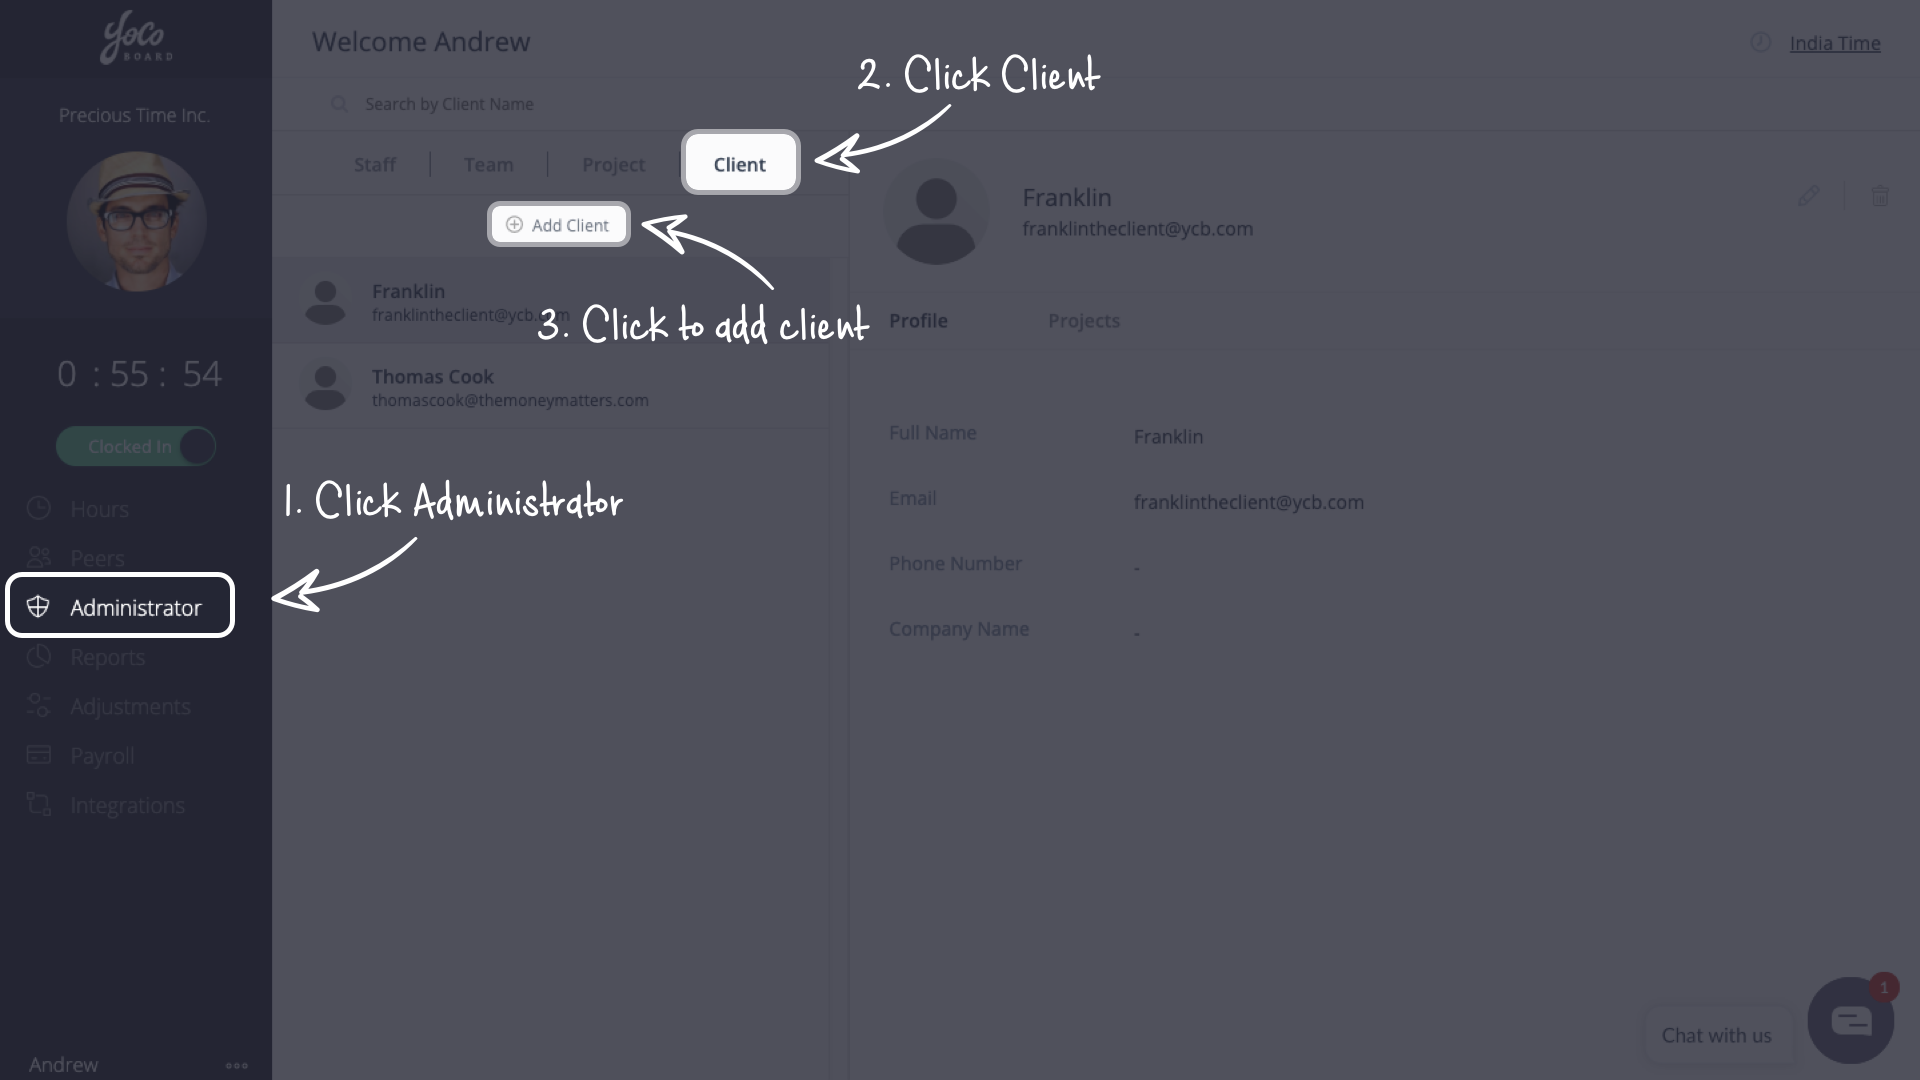
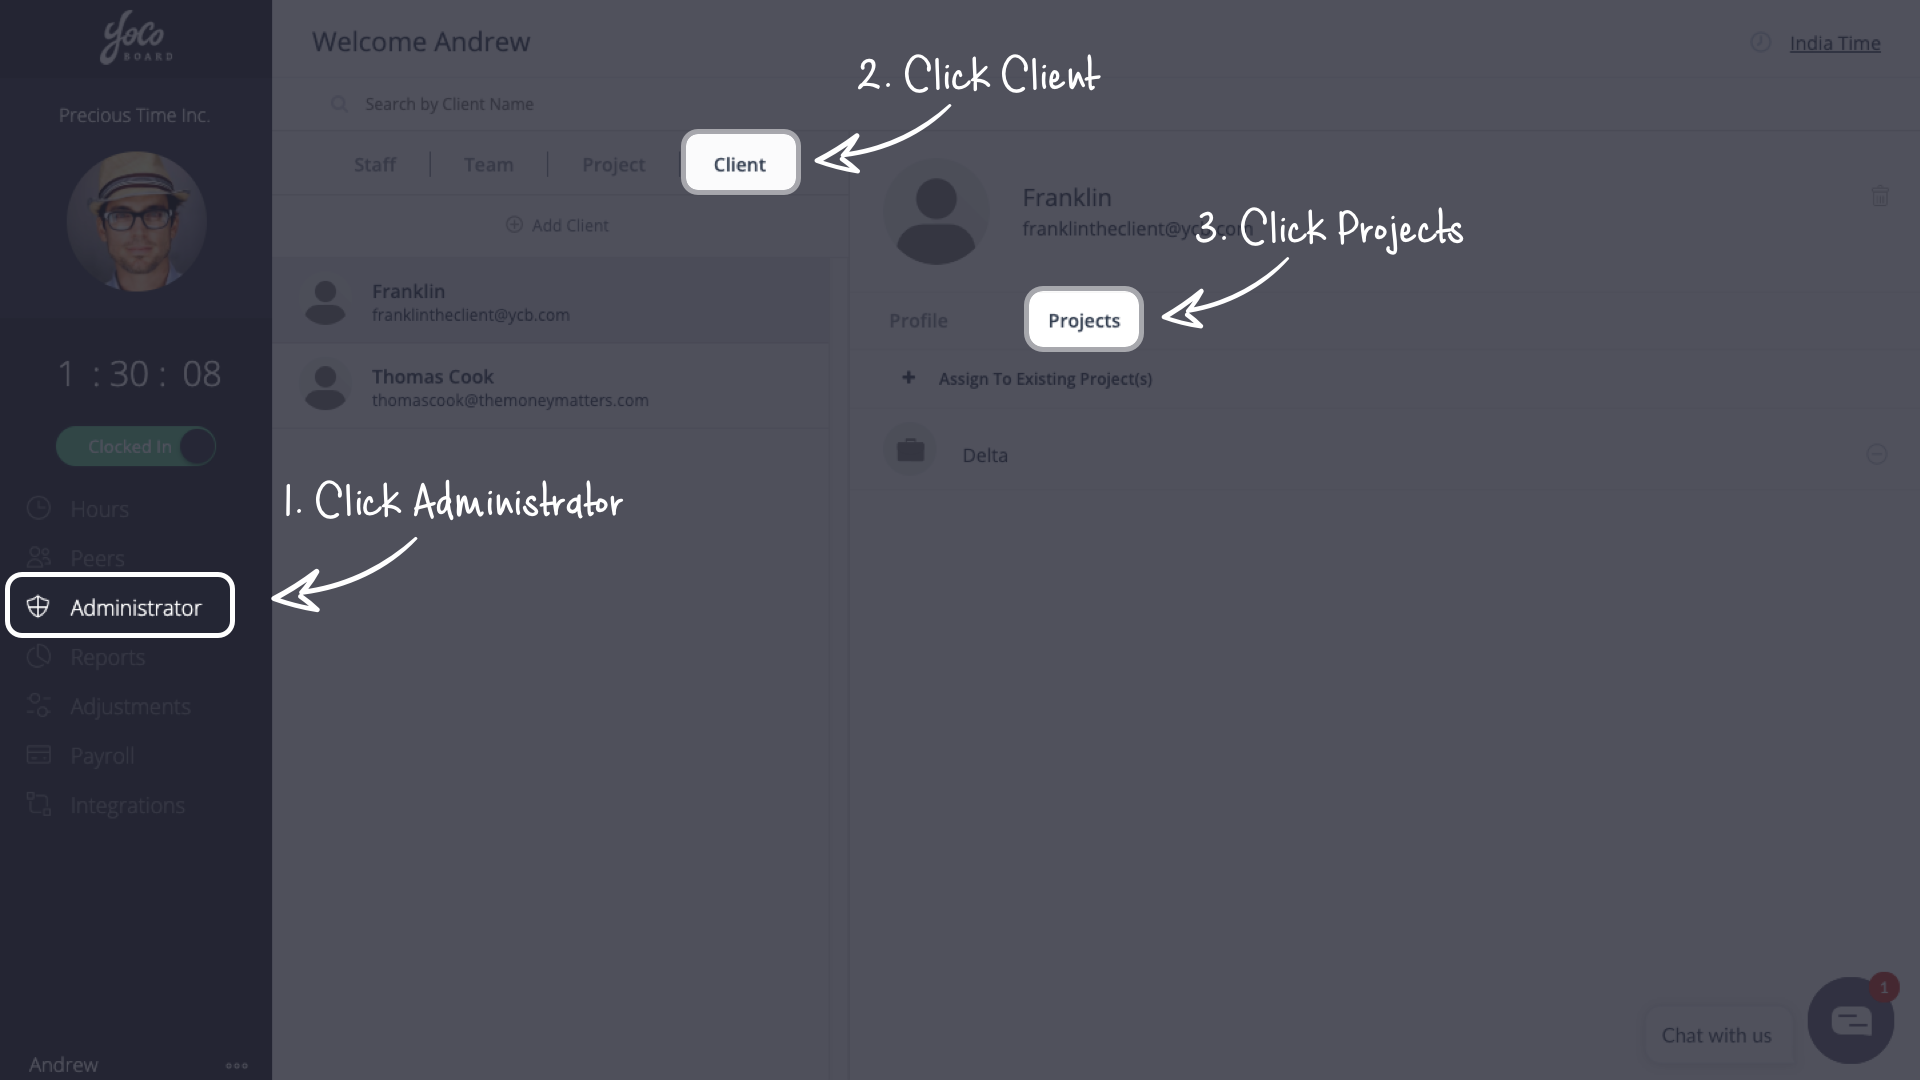
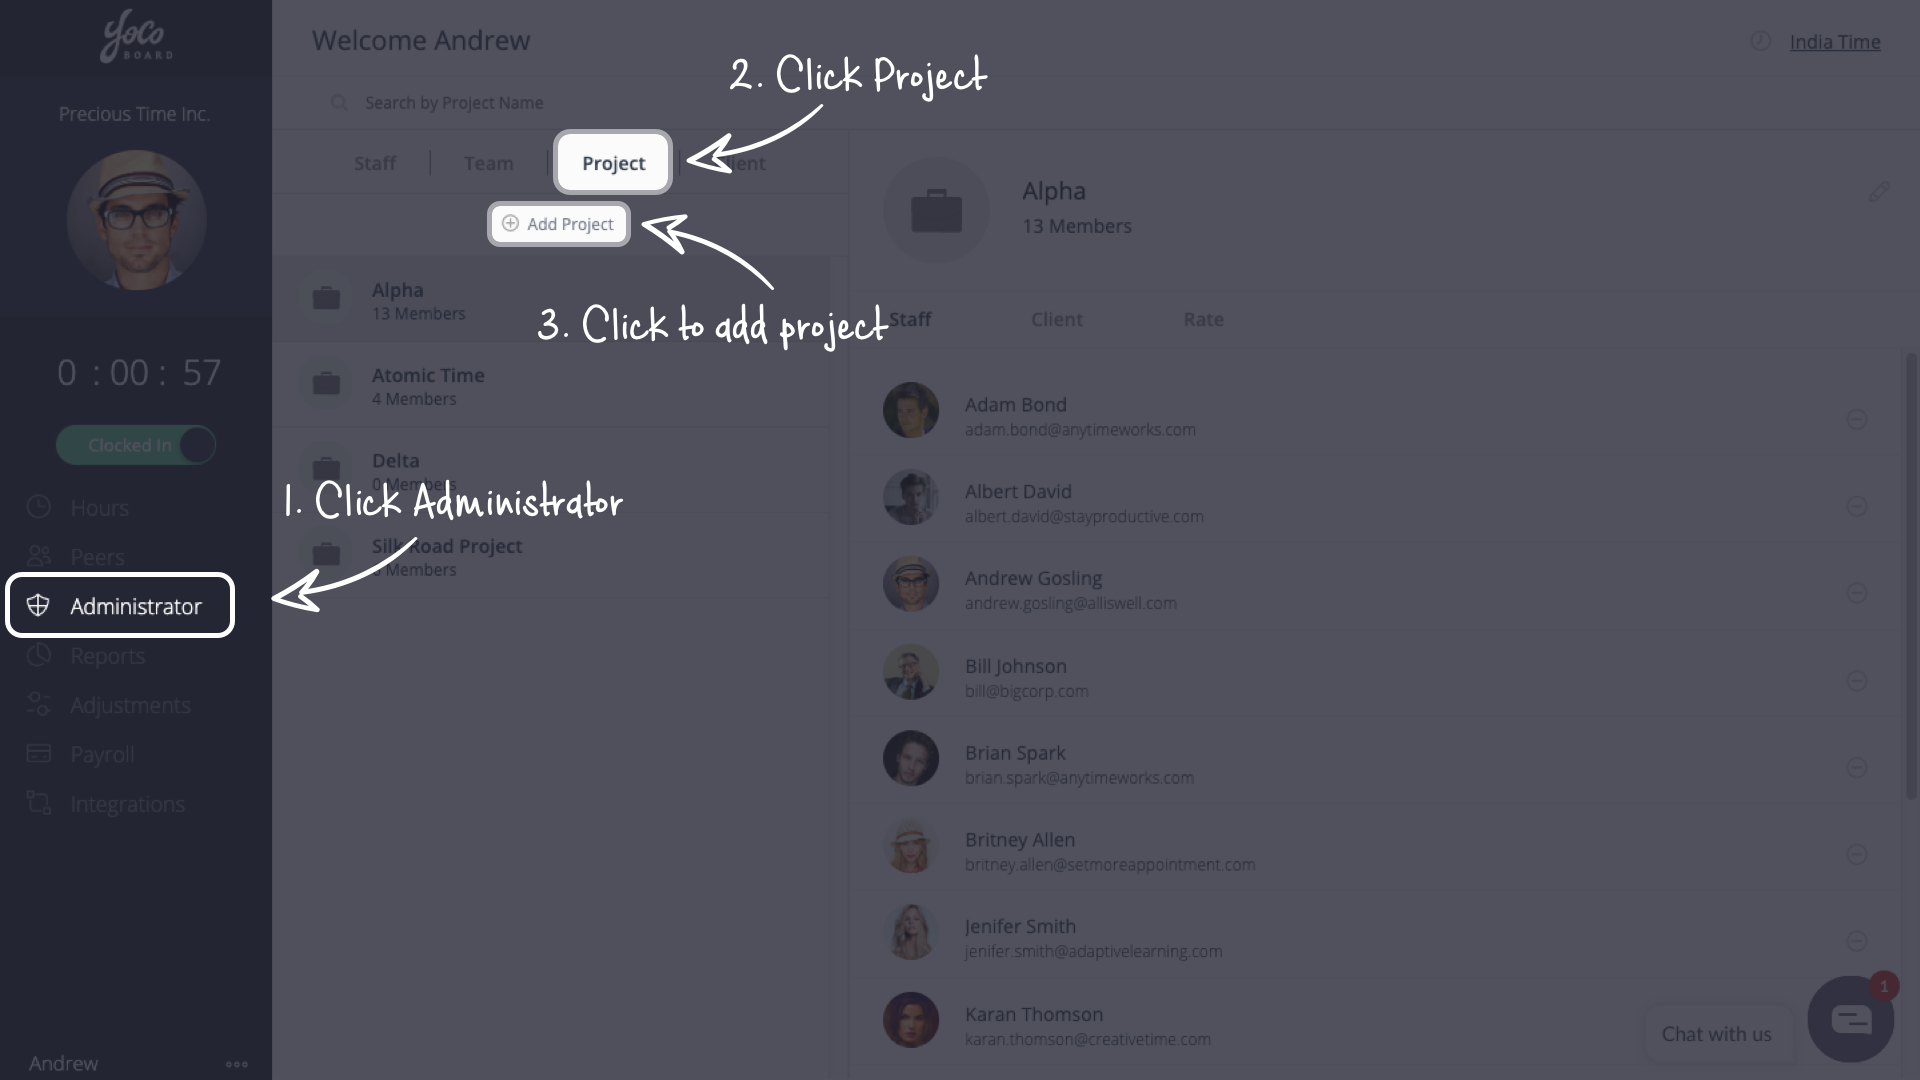
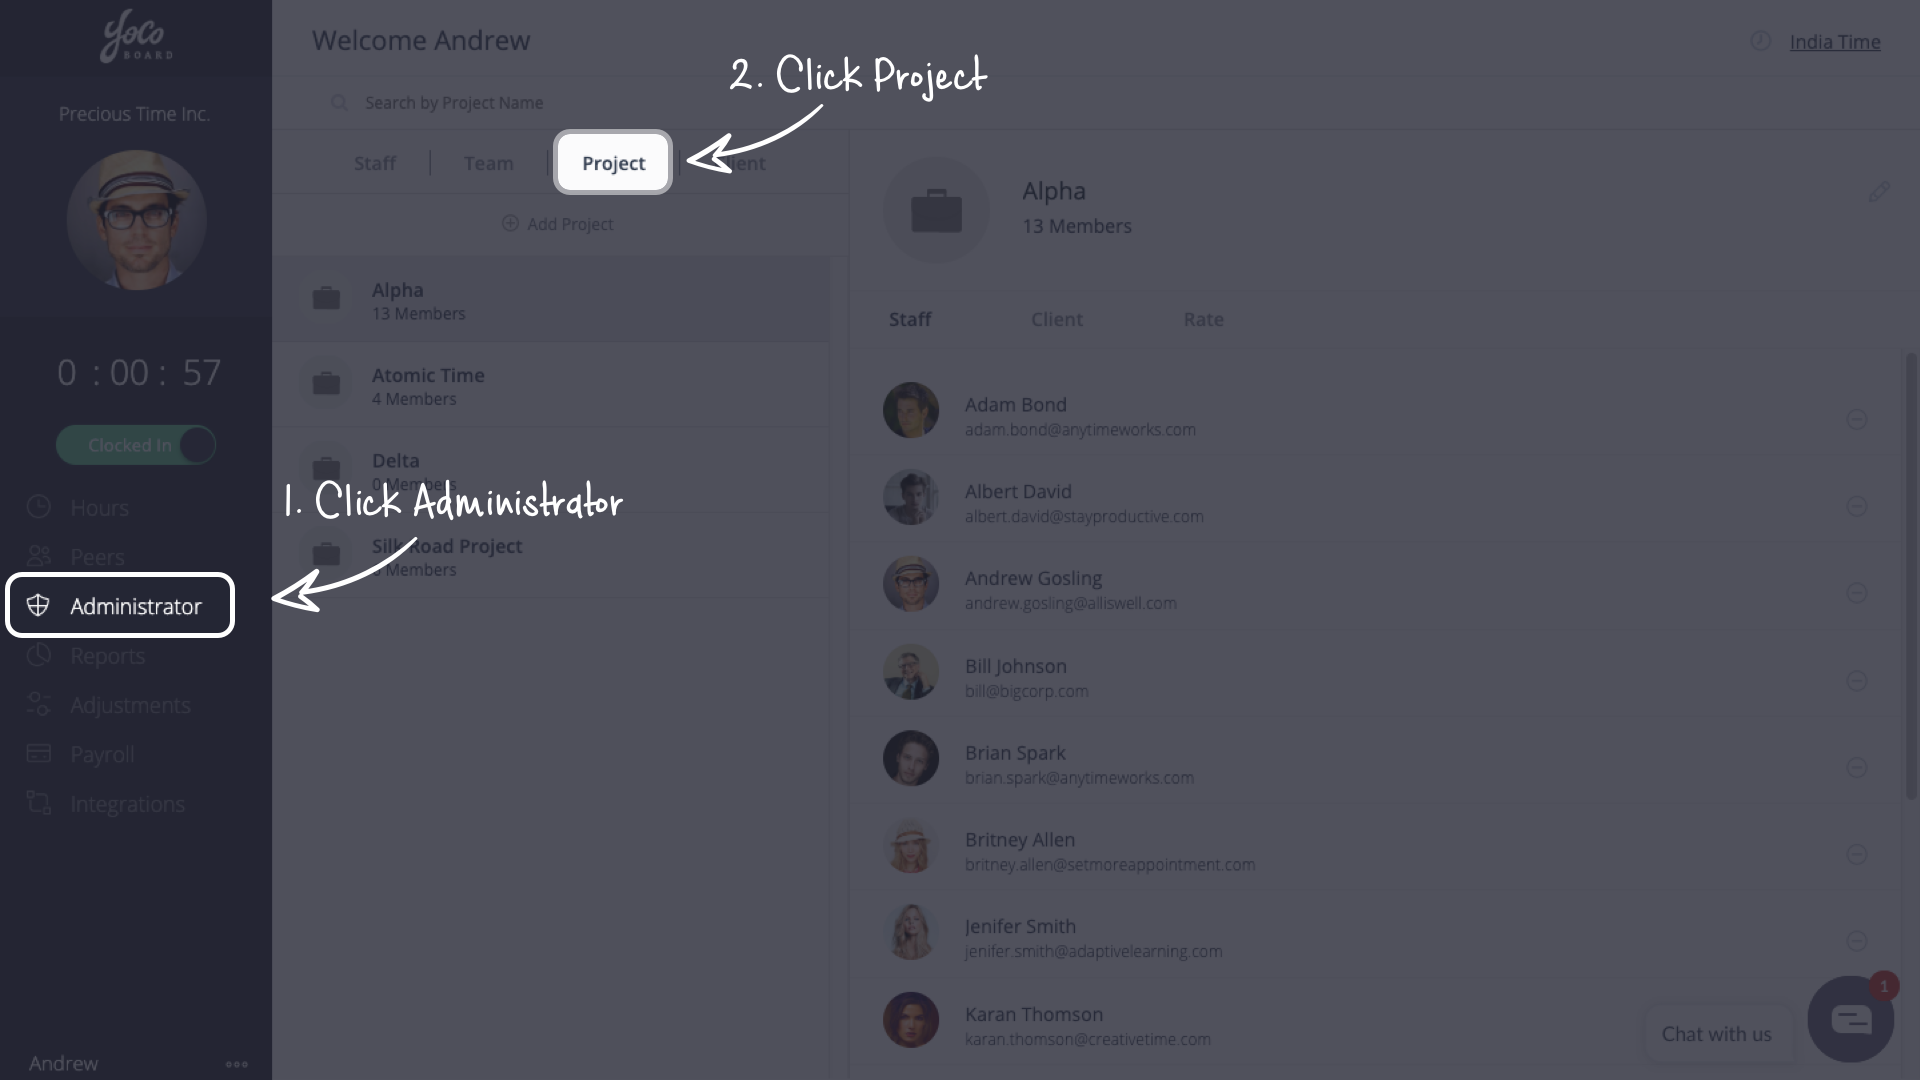
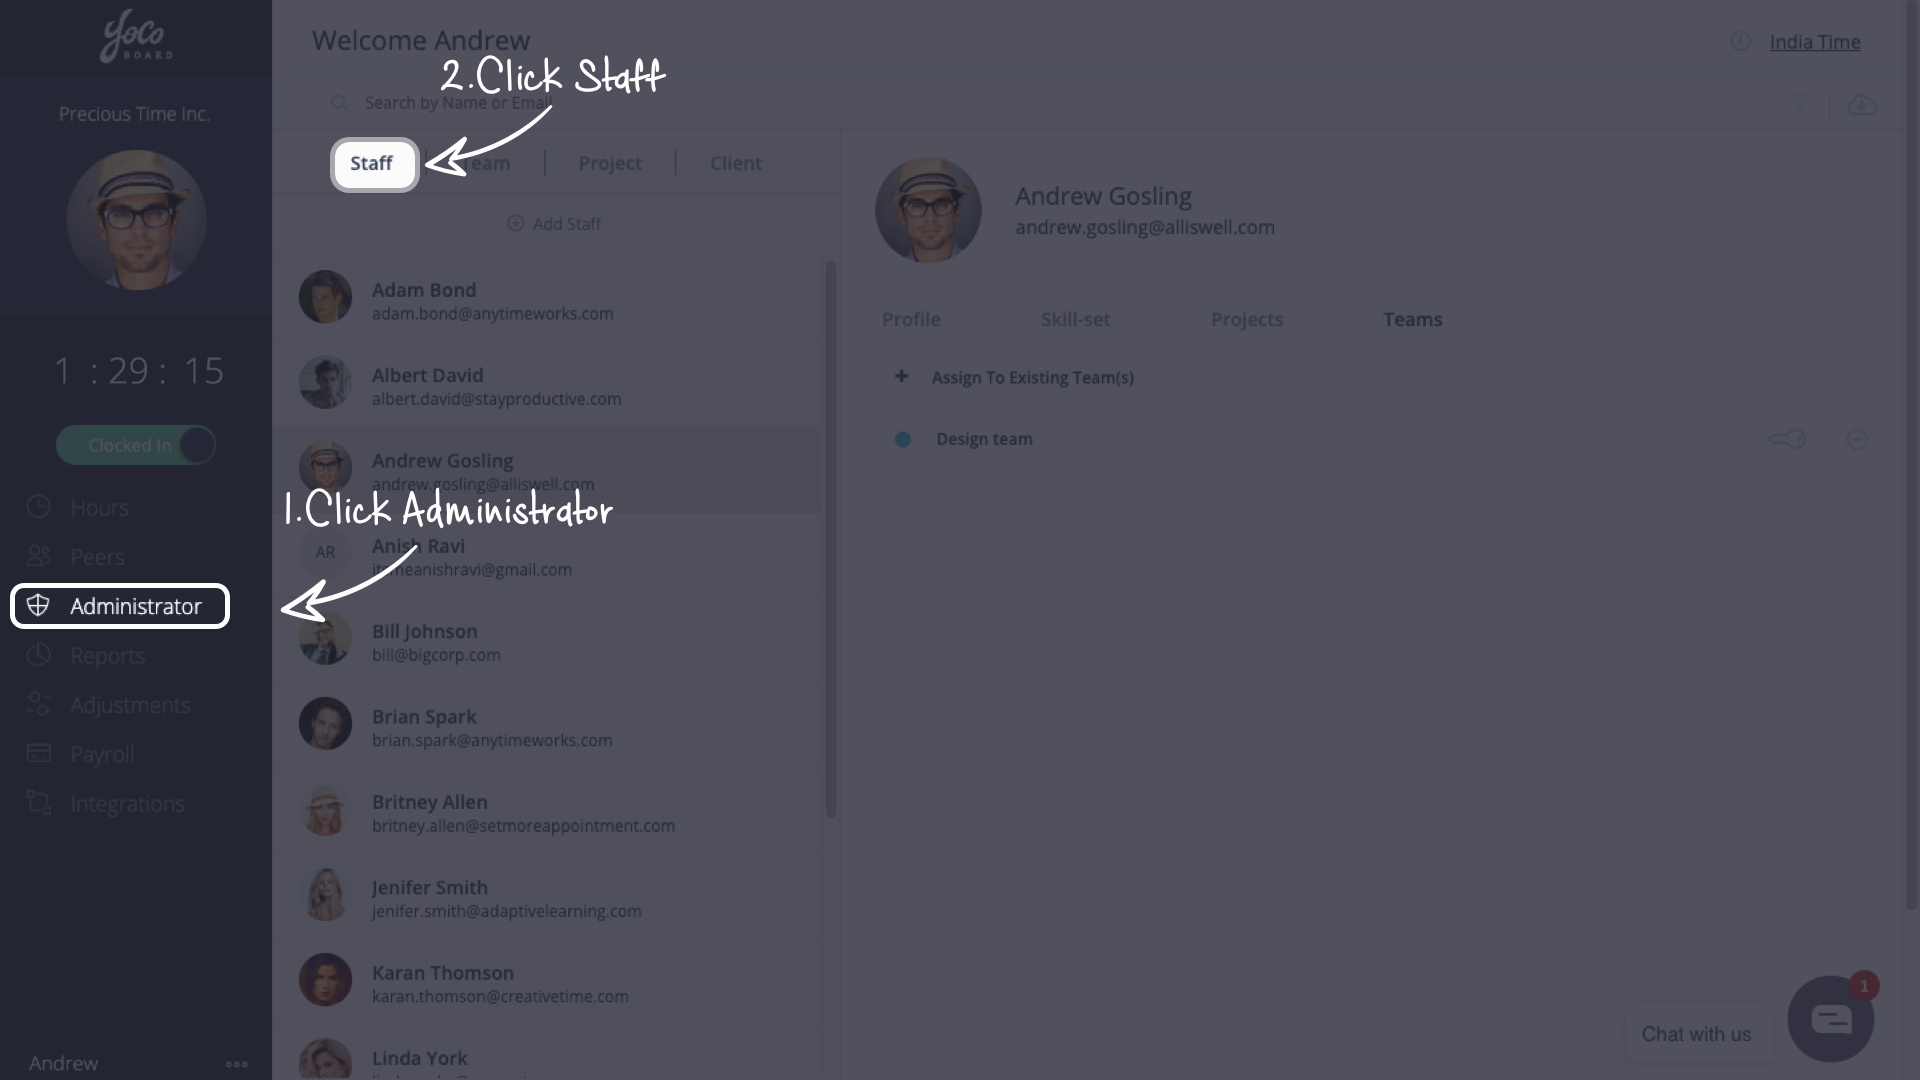
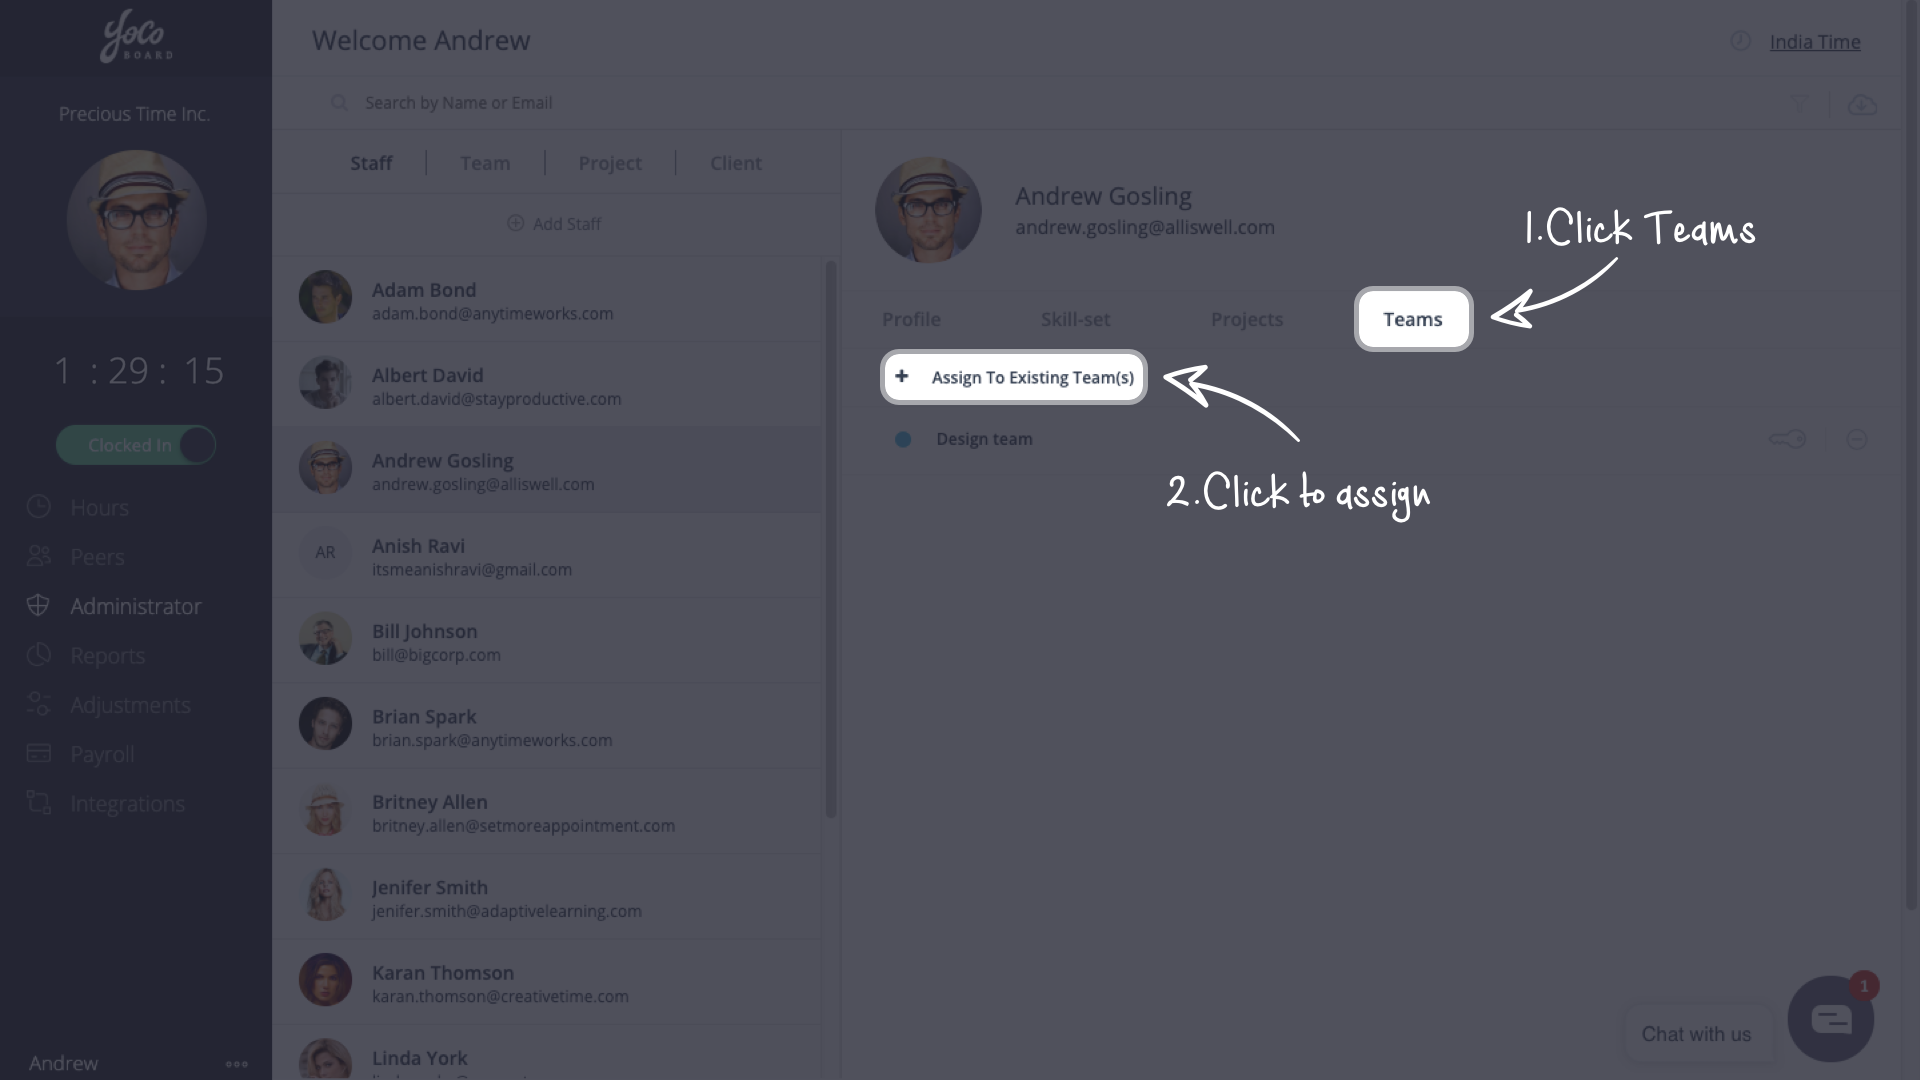
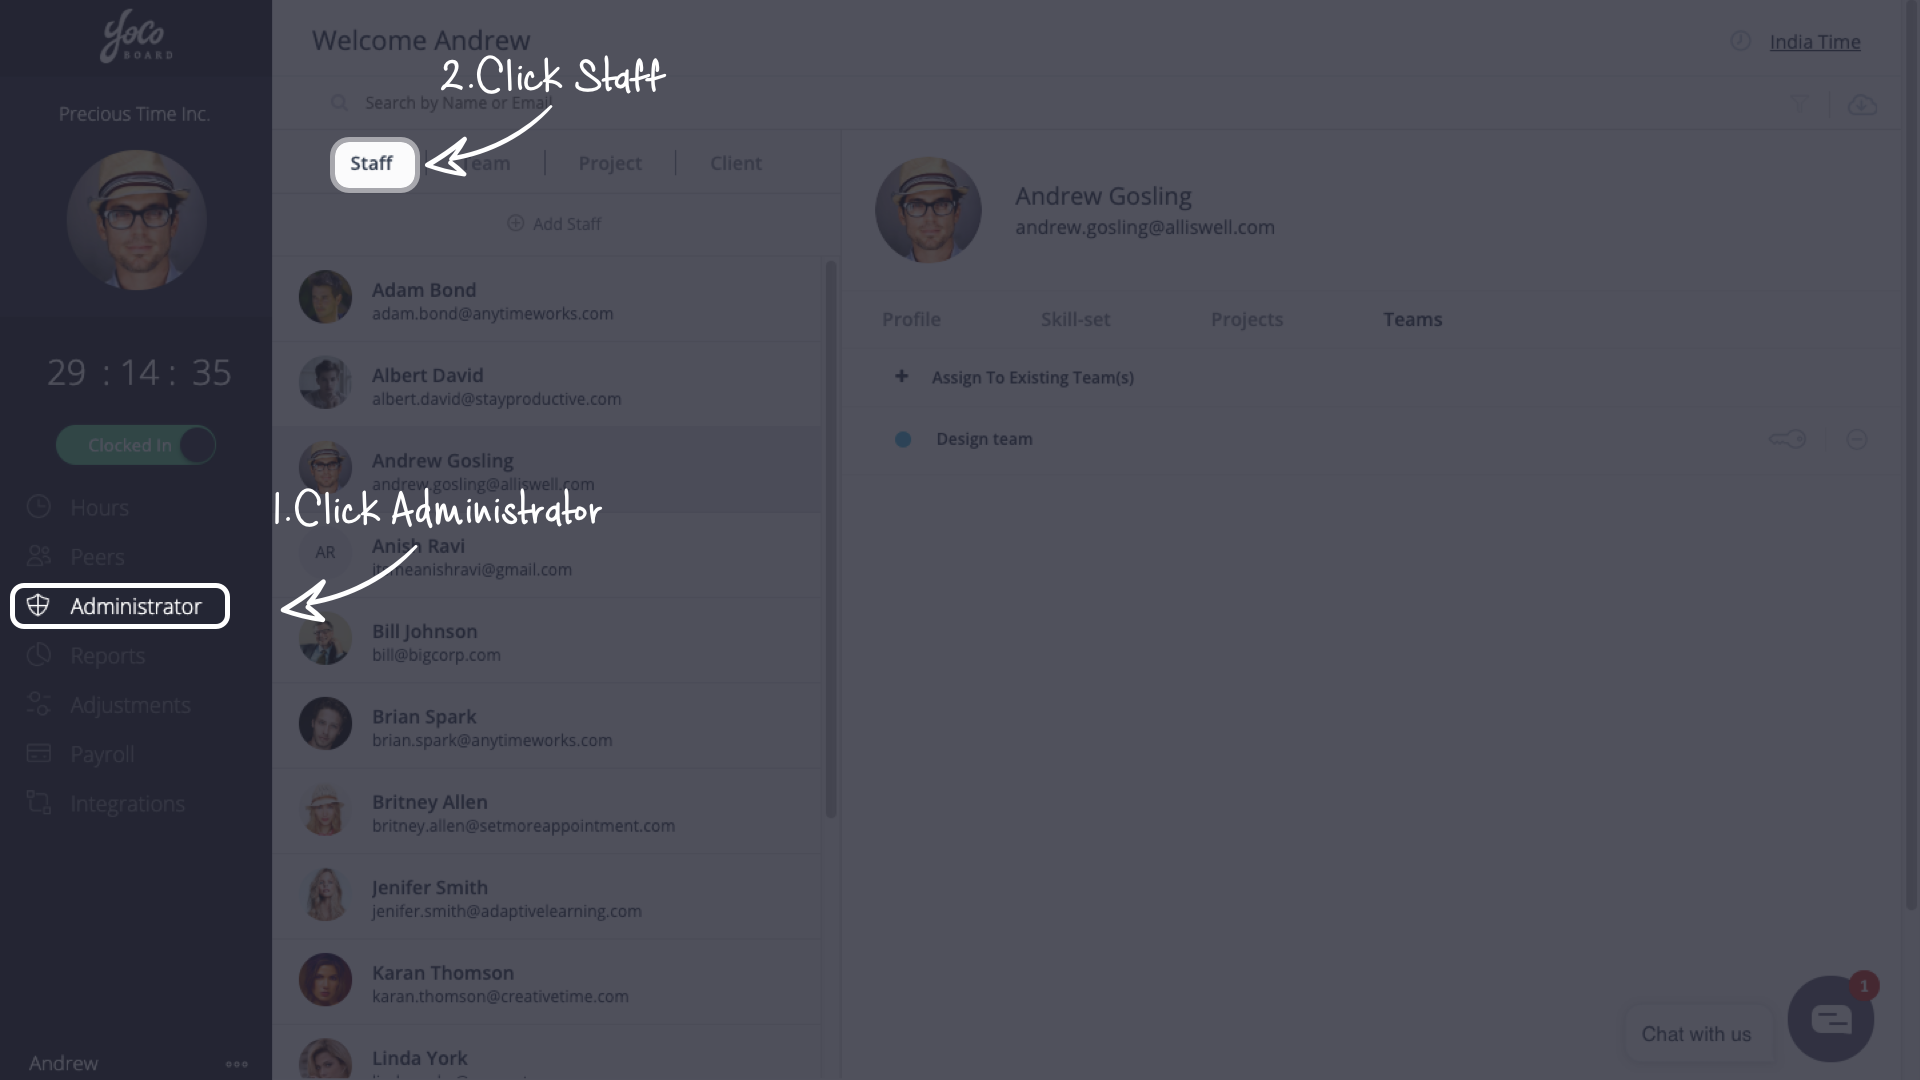
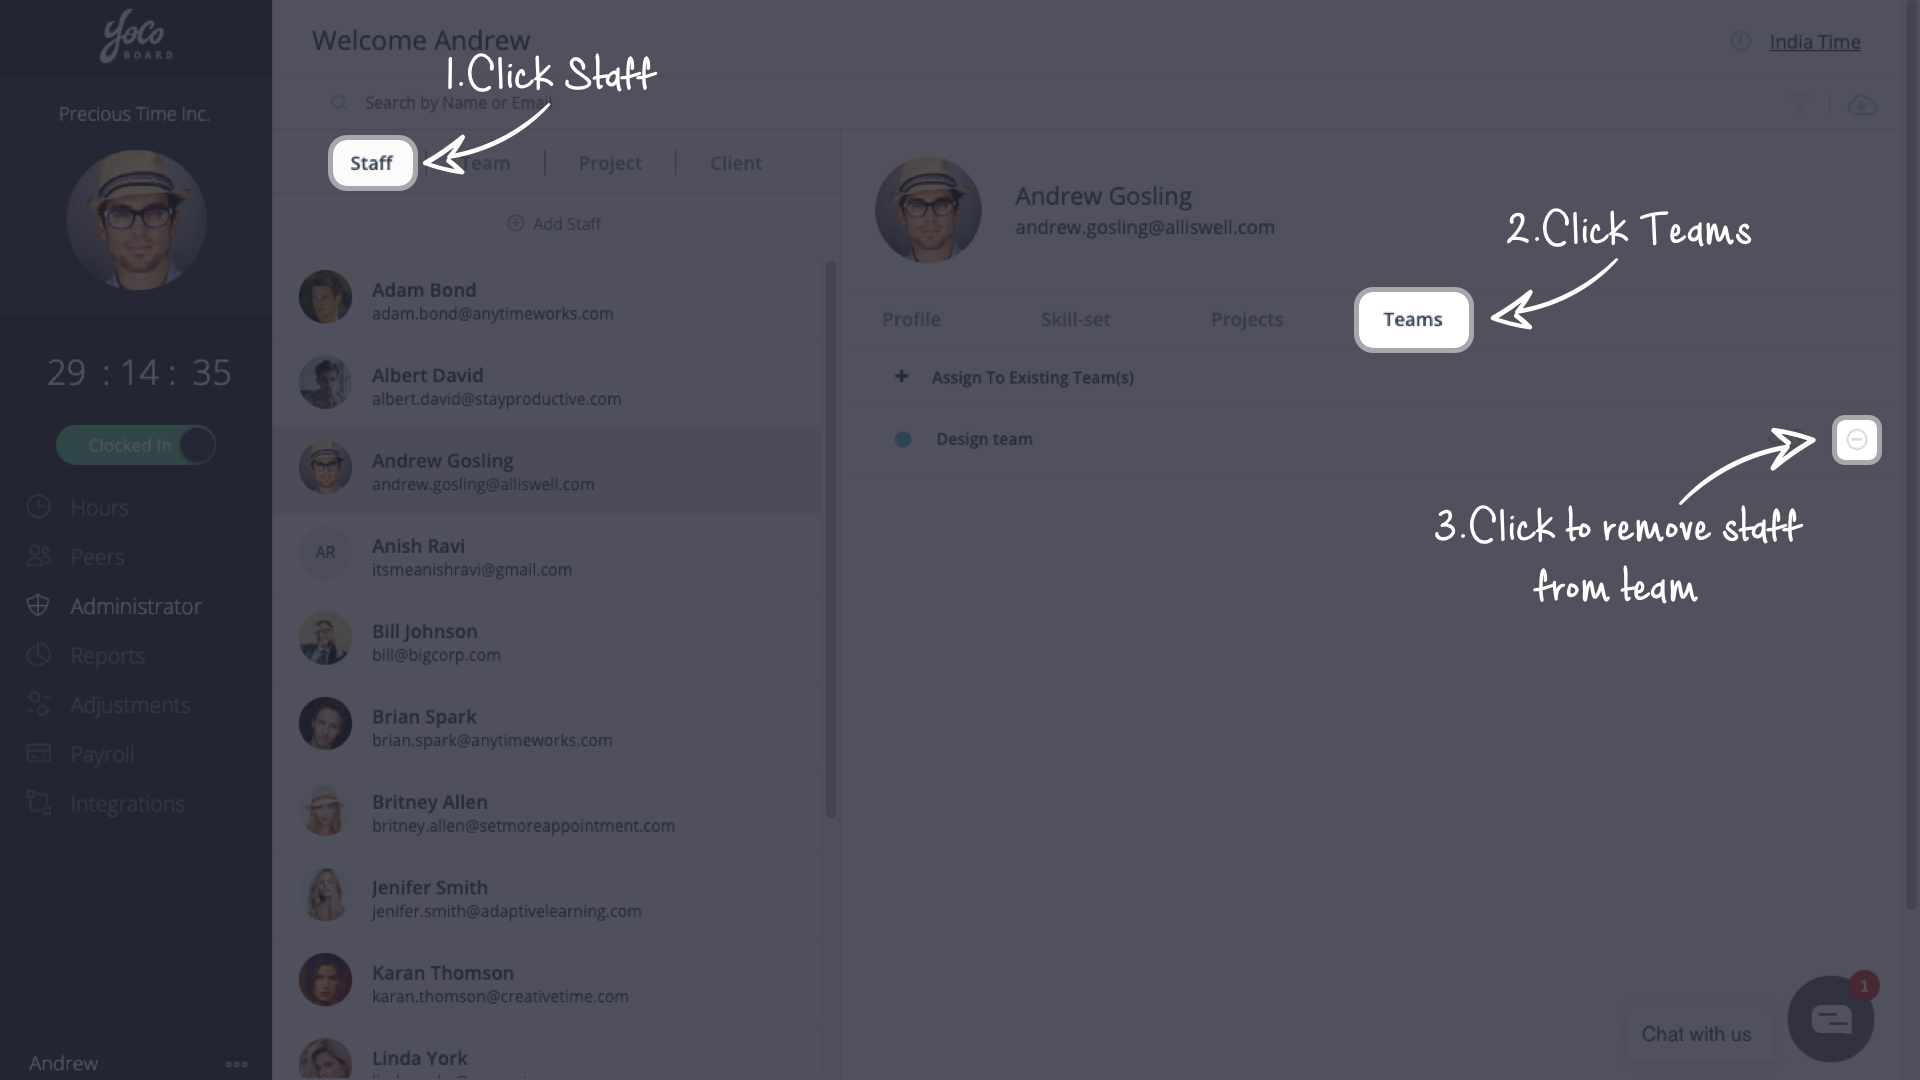
- On the YoCoBoard sidebar, click Administrator and select the Staff tab.

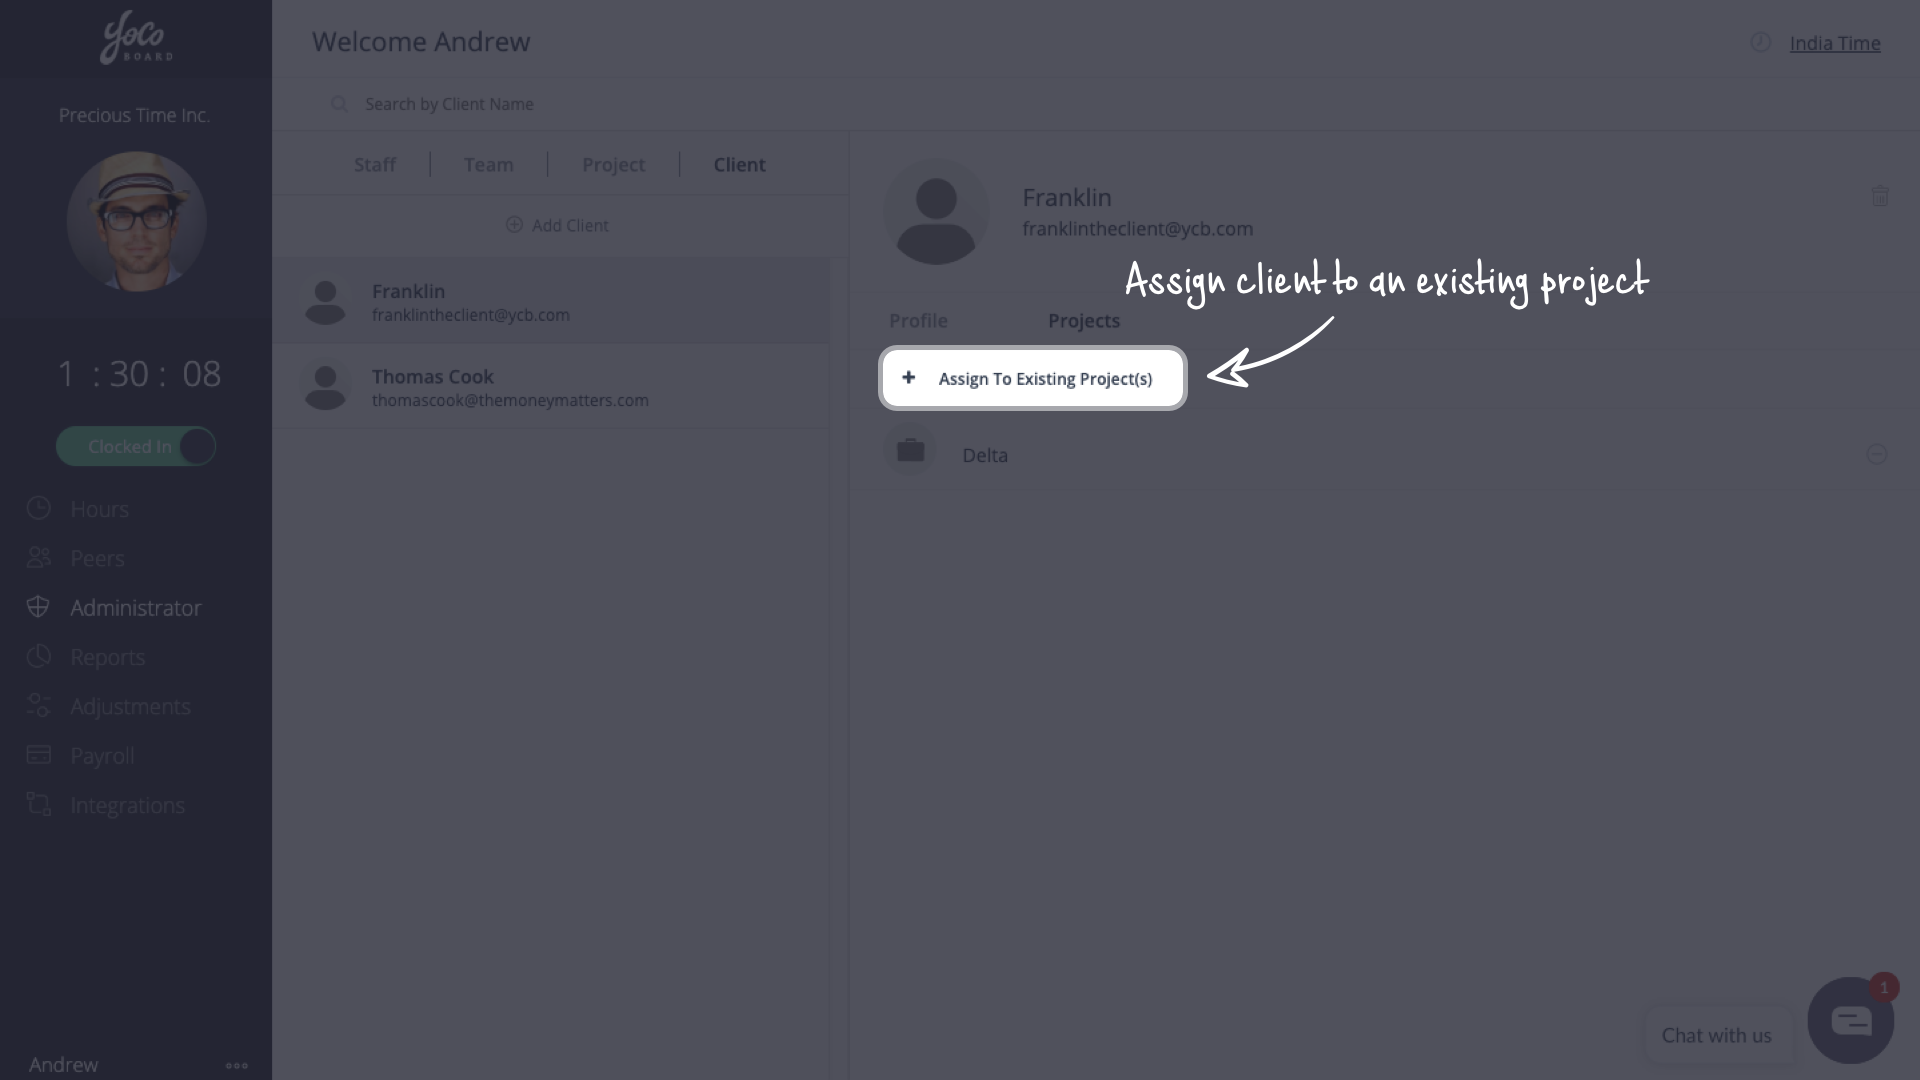
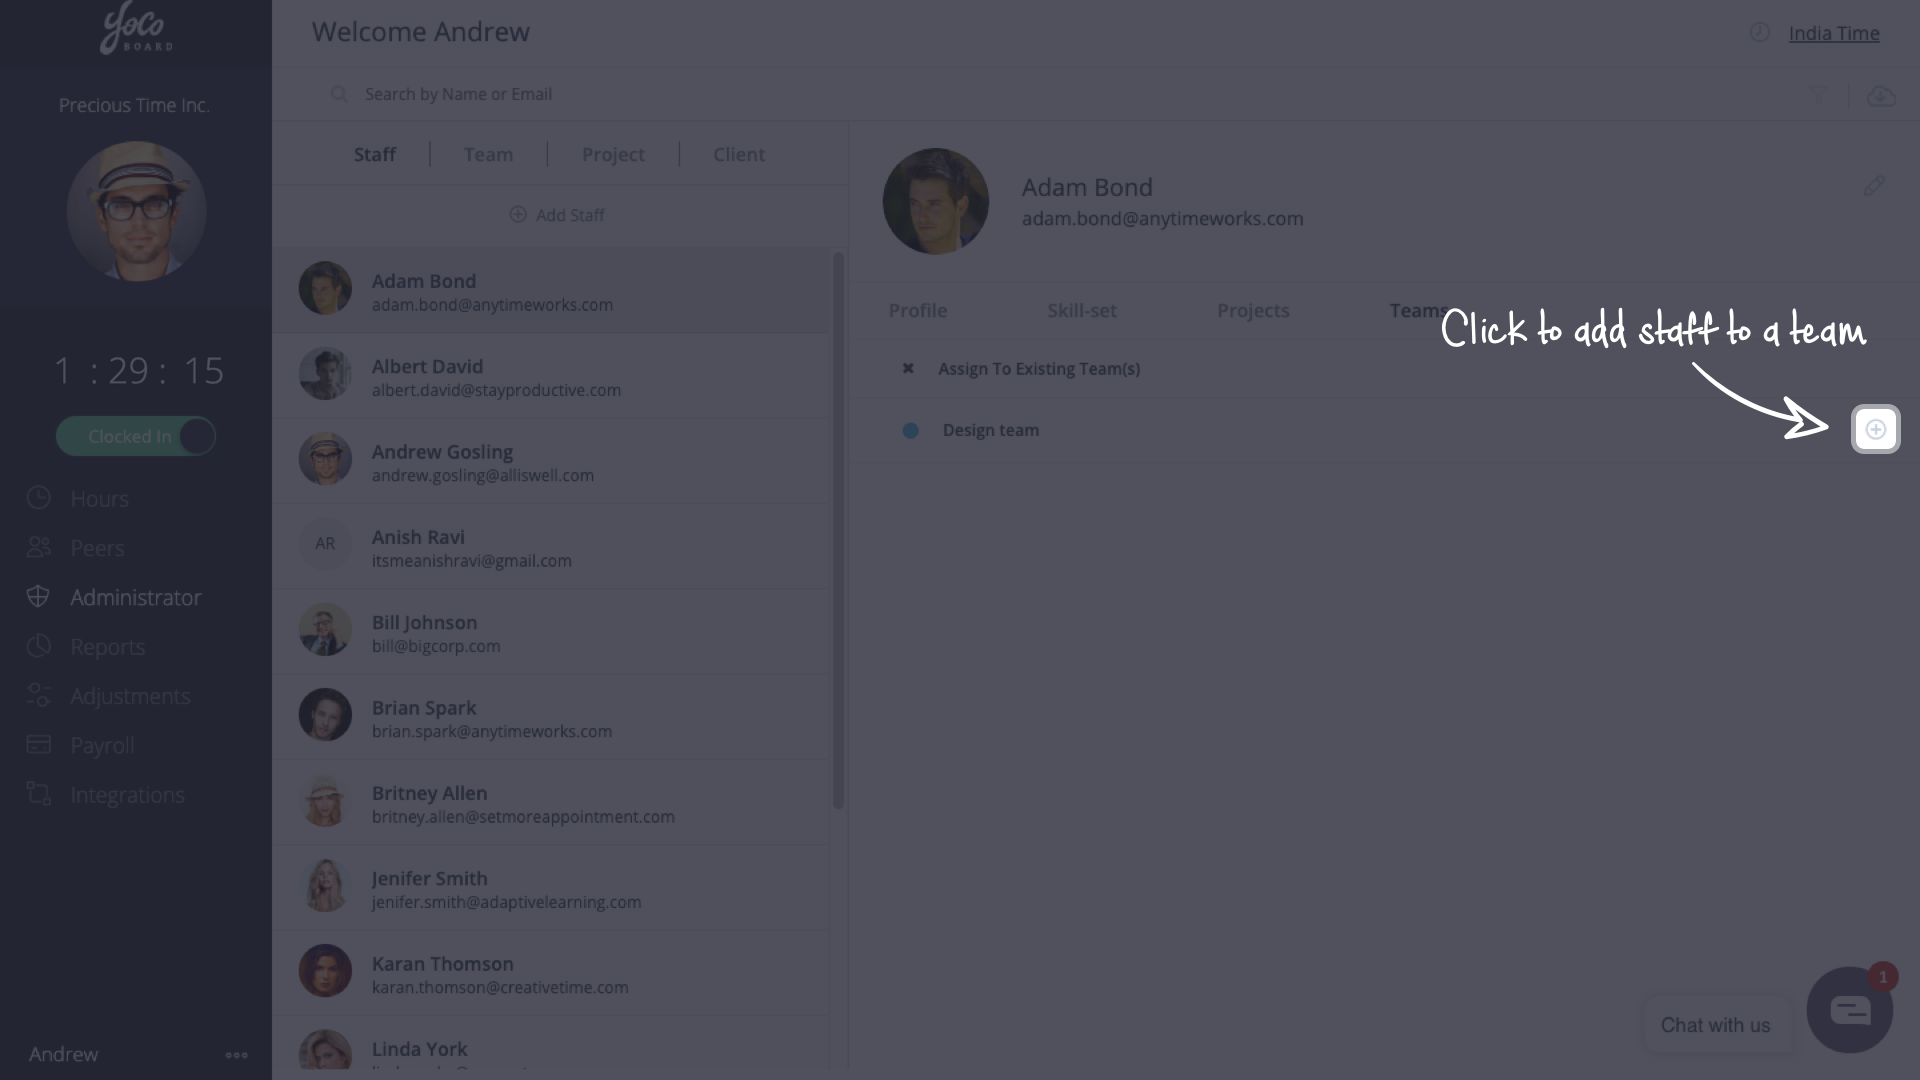
- Select a staff member from the list to view the staff details. Select the Skill-set tab.

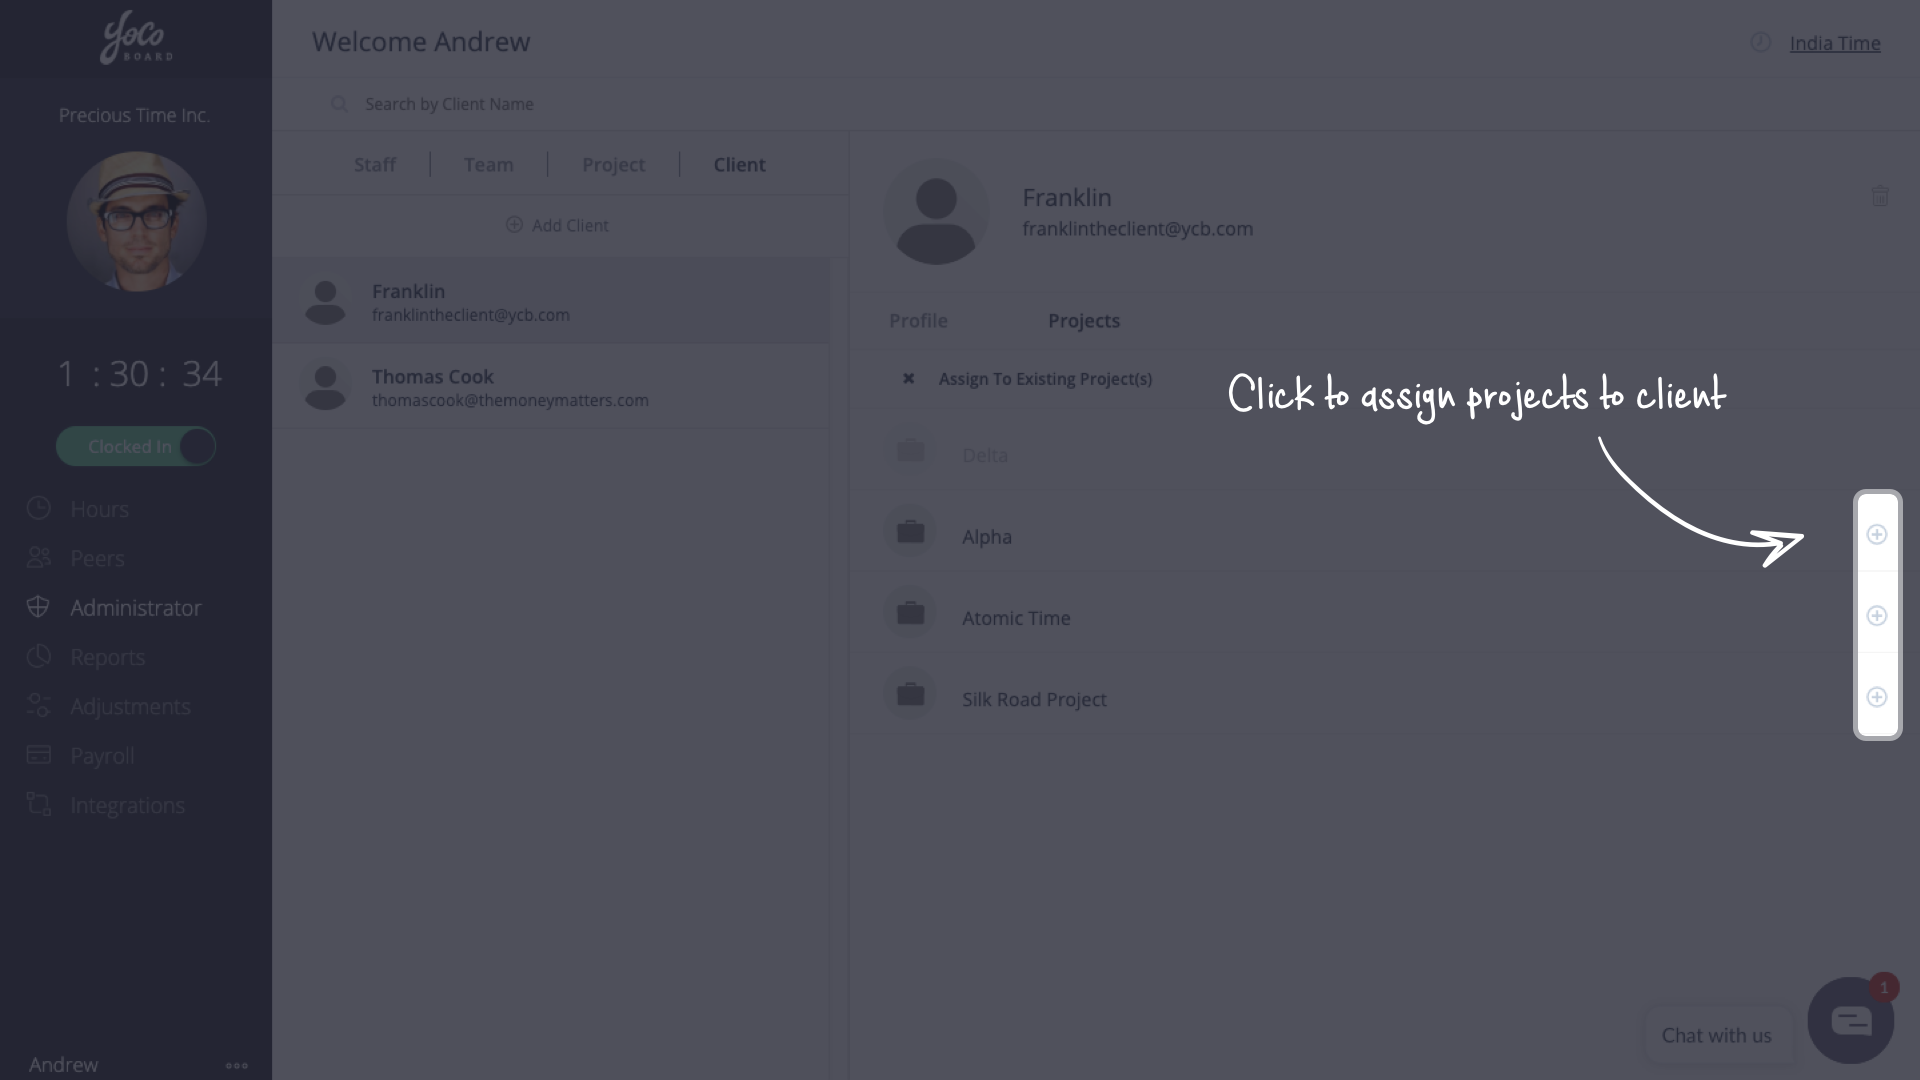
- Skill-sets are listed under different headings like Clock, Report, Adjustment, Payroll, Additional Skills. To enable a skill-set, click to move the switch next to the skill-set to the ON position.