• Home
  • Blog
YoCoBoard – Support

Category Archives: Hours

Confirm Hours

April 1, 2020 1:12 am / Leave a Comment / YoCoBoard Admin

Verify & Confirm Time Entries

YoCoBoard users can verify their time entries and confirm them for payroll processing. Verifying and confirming is an important step in letting the Super Admin know that you have checked and authorized the tracked hours for payroll. You can also associate your time entries to a particular project before confirming your hours.

Note:

  • Once your hours are confirmed, you cannot make any further changes.
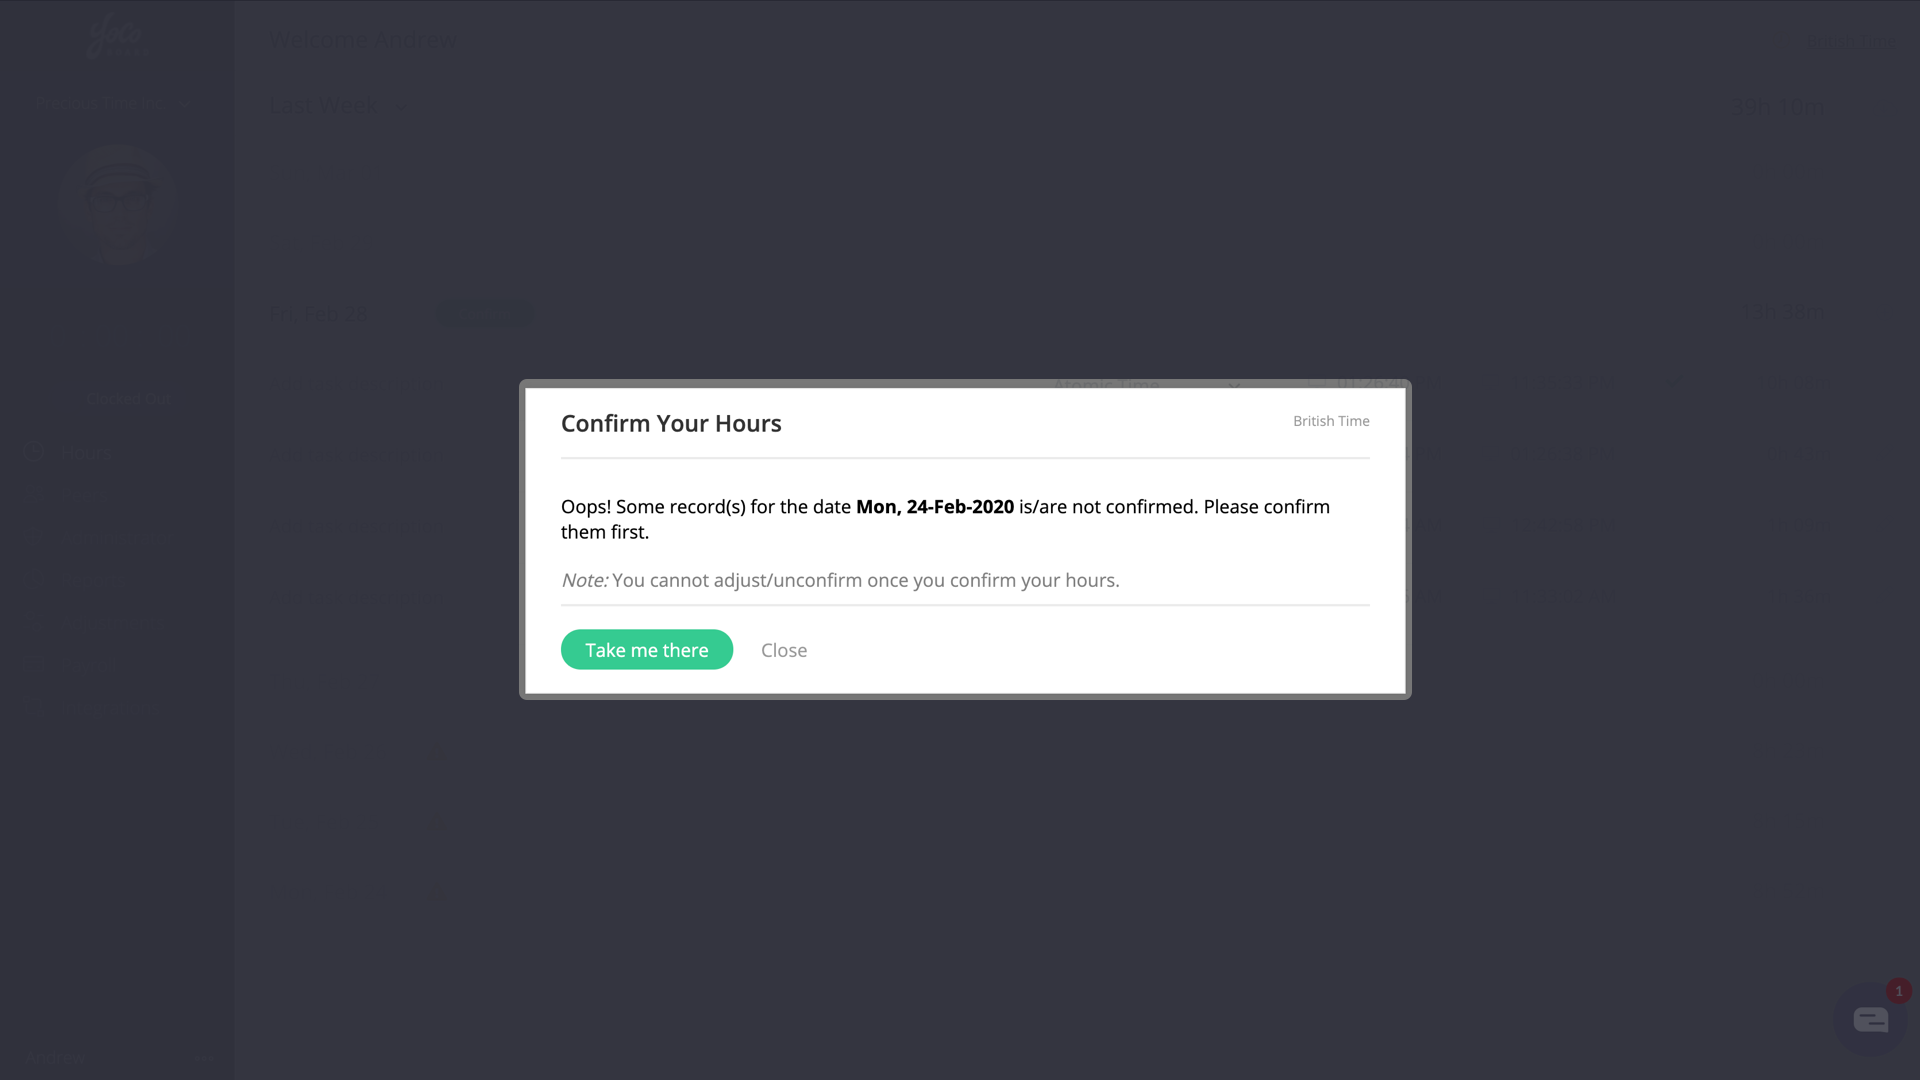
  • If there are unconfirmed hours at an earlier date, you will need to confirm them first before confirming successive dates.

1.1 Confirming hours

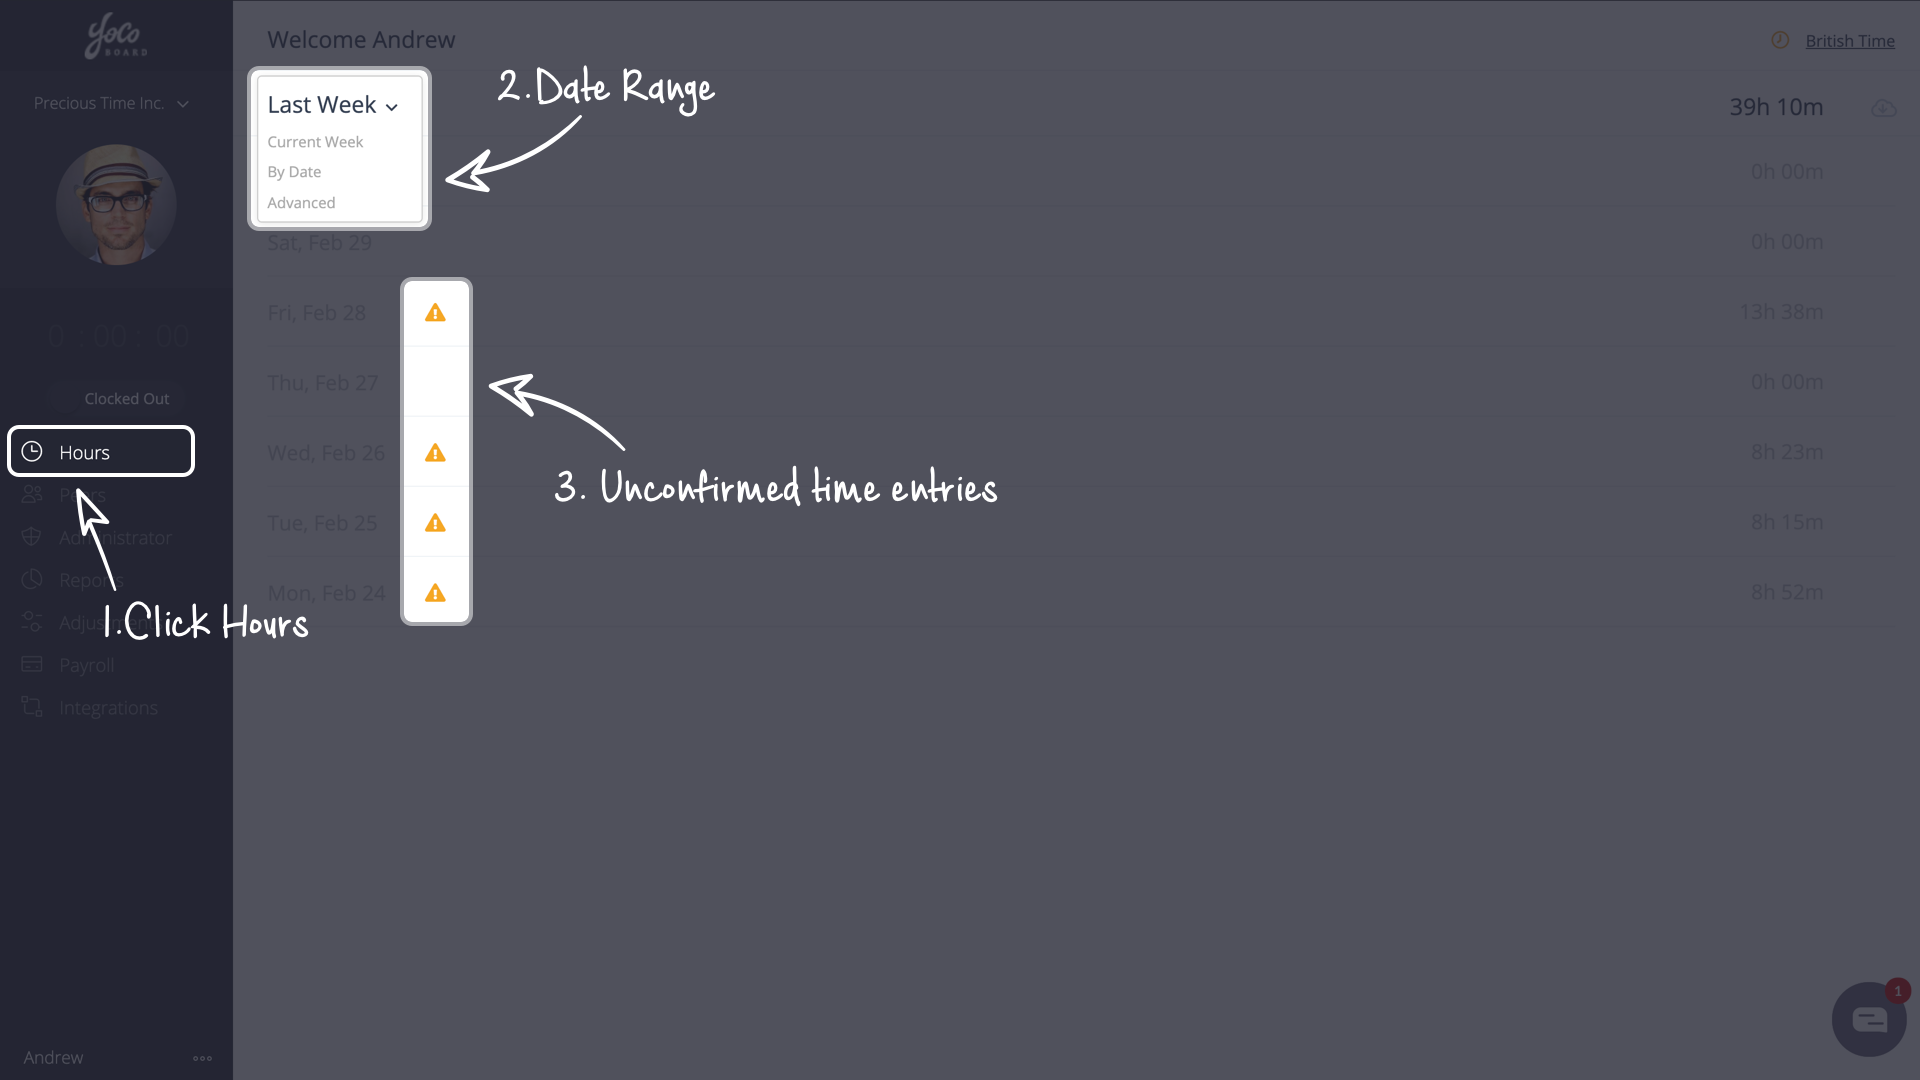
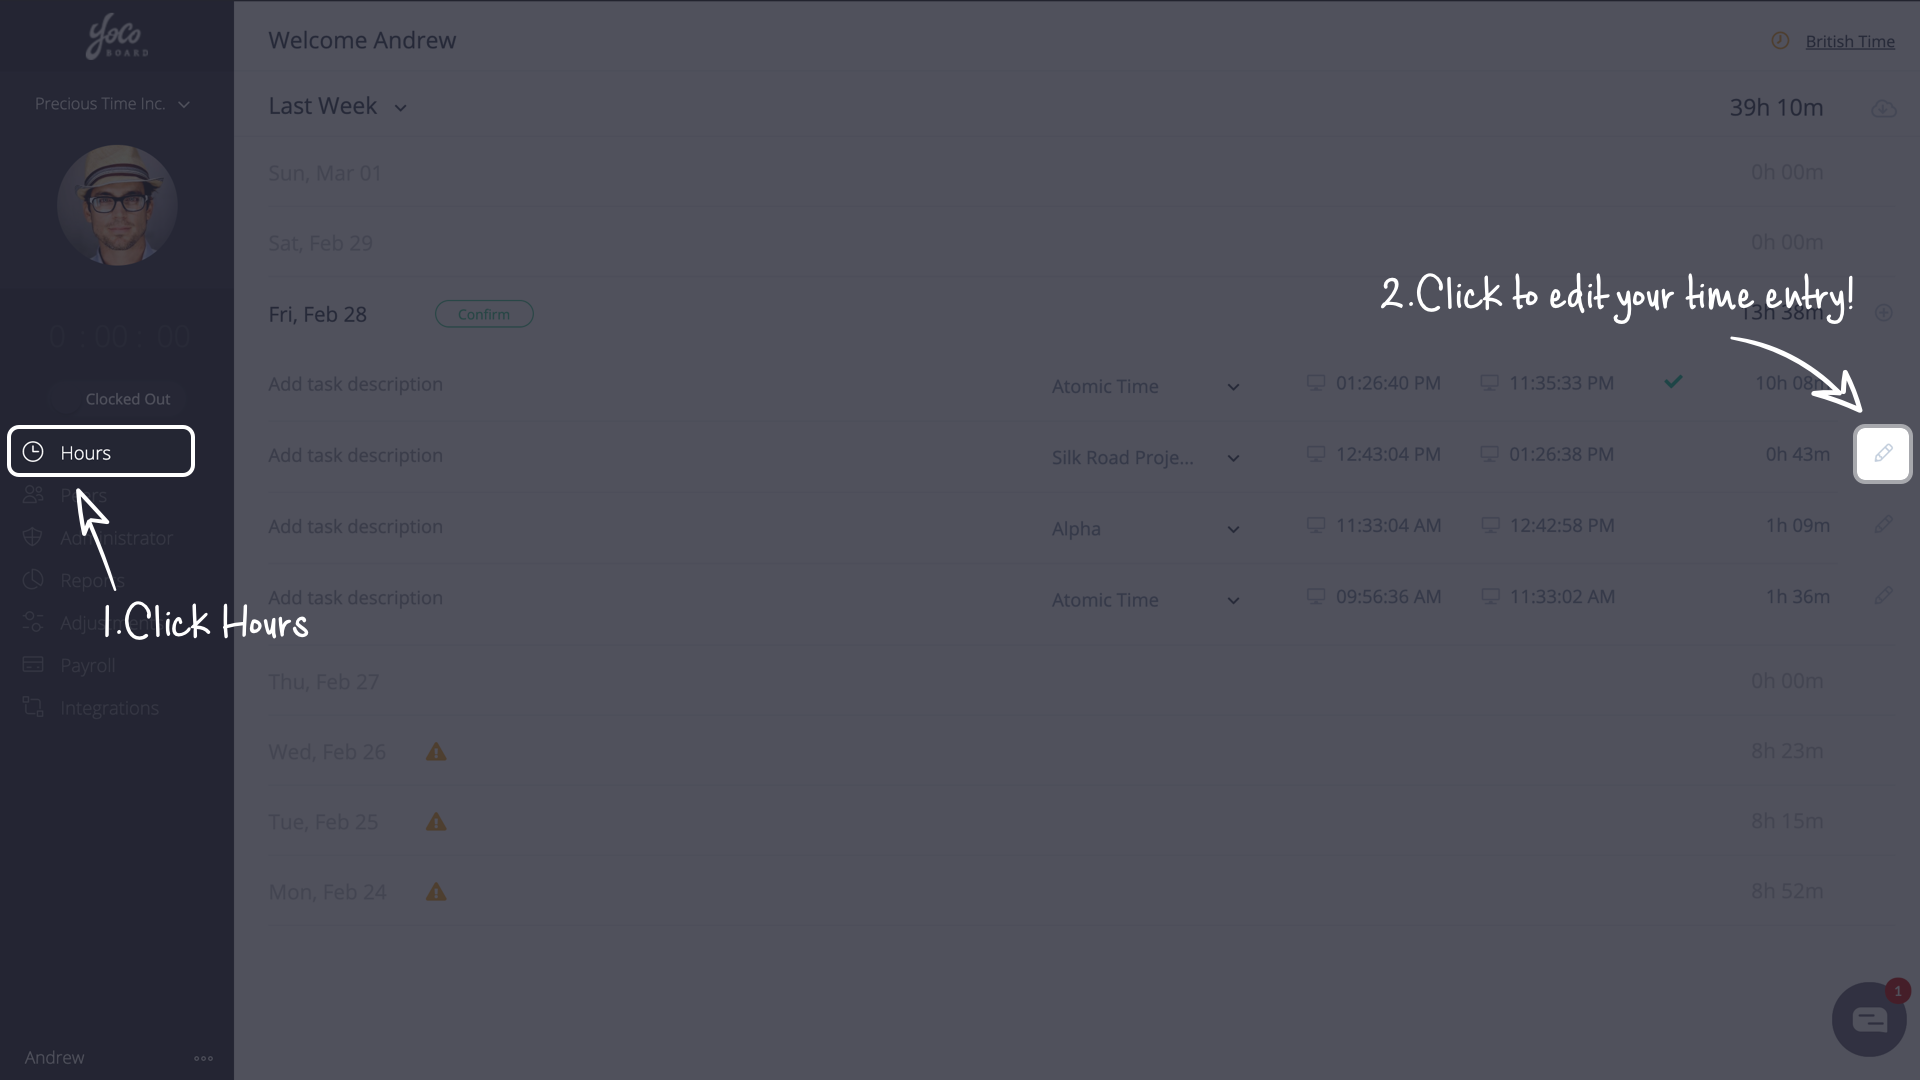
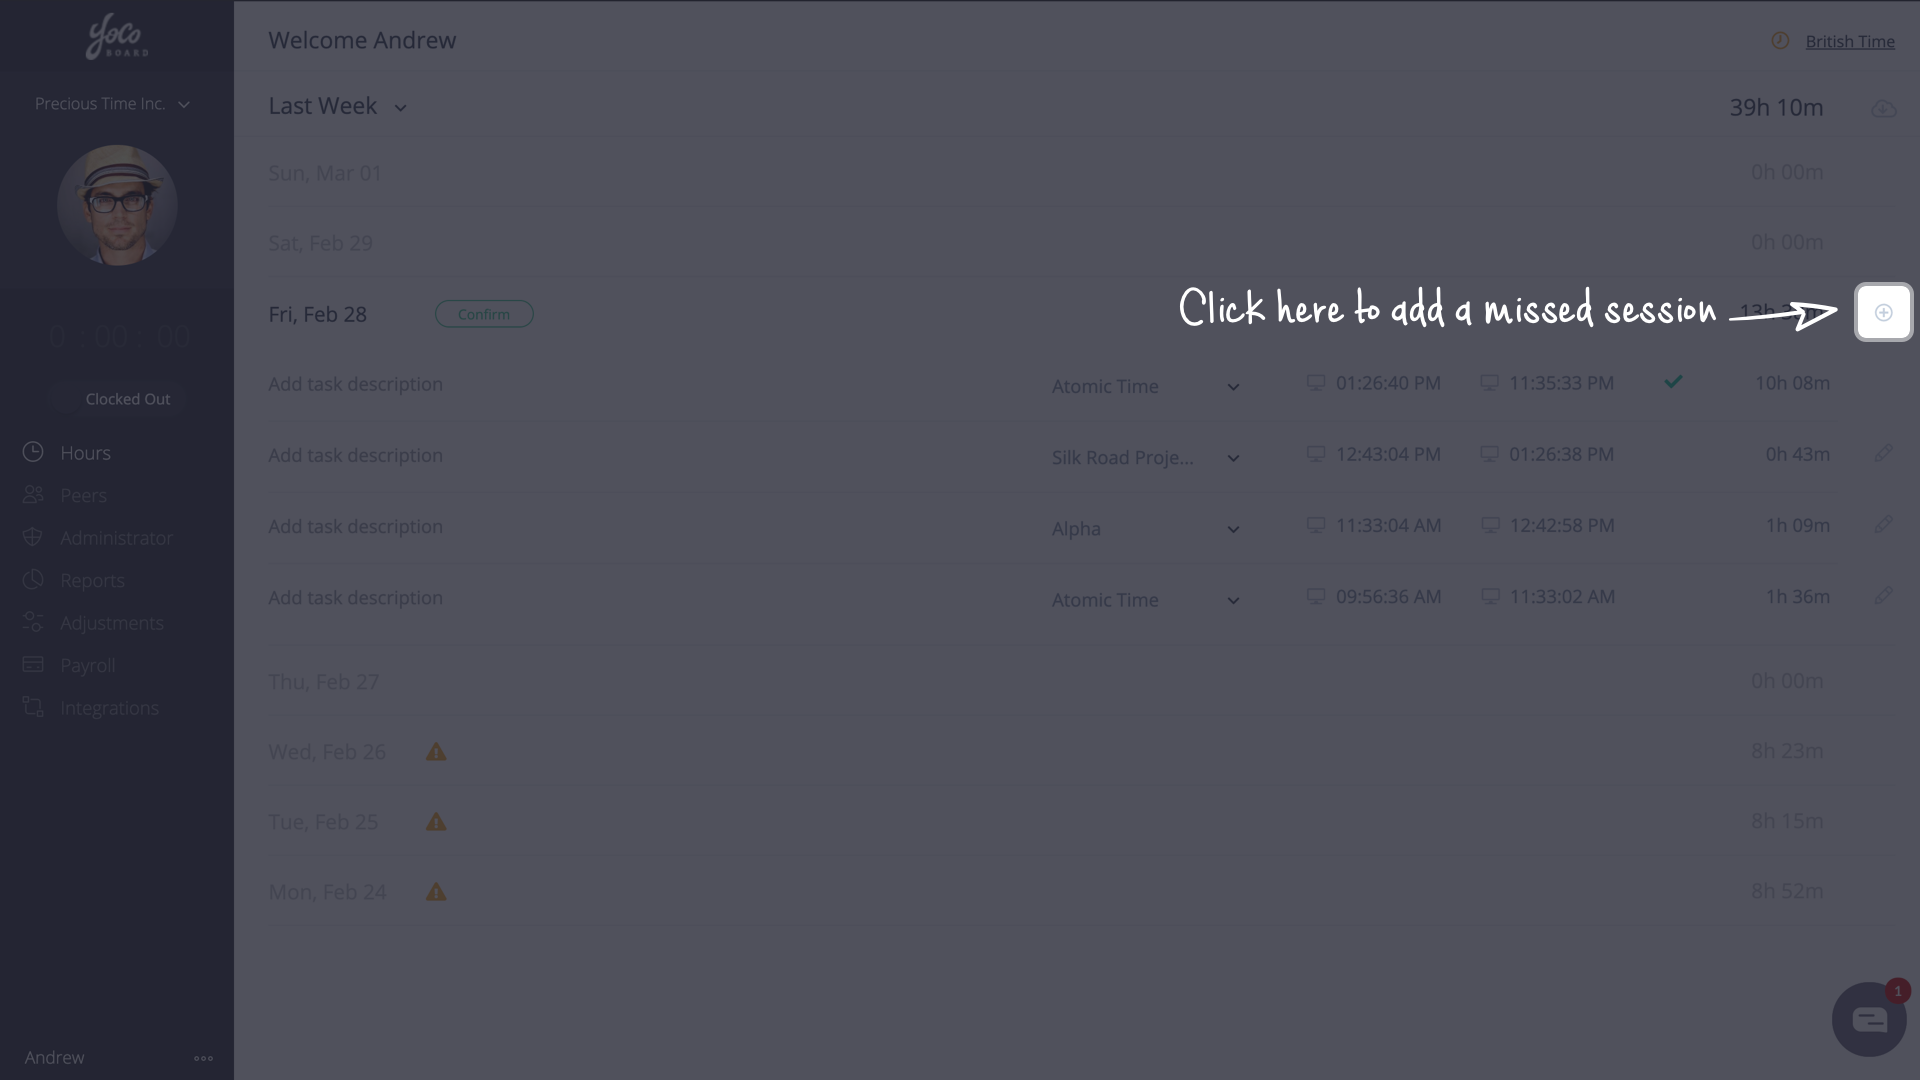
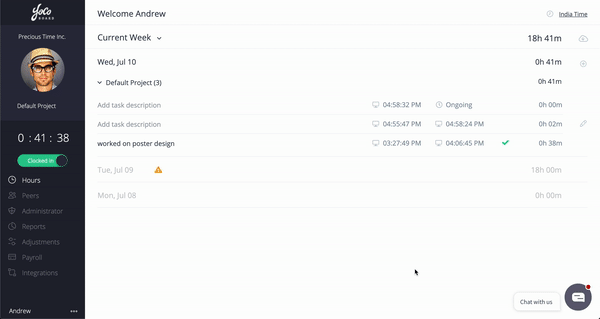
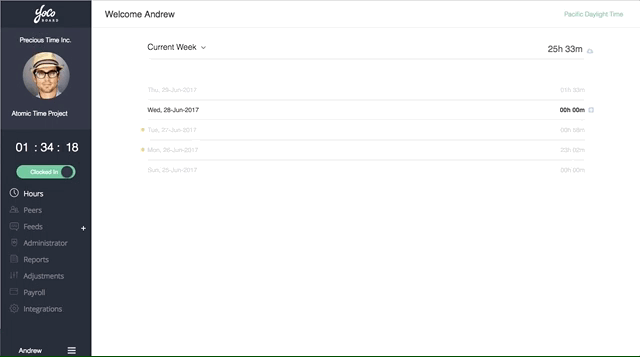
  • On the YoCoBoard sidebar, click Hours and choose a date range. All unconfirmed time entries falling within the date range will be marked with an orange warning triangle.
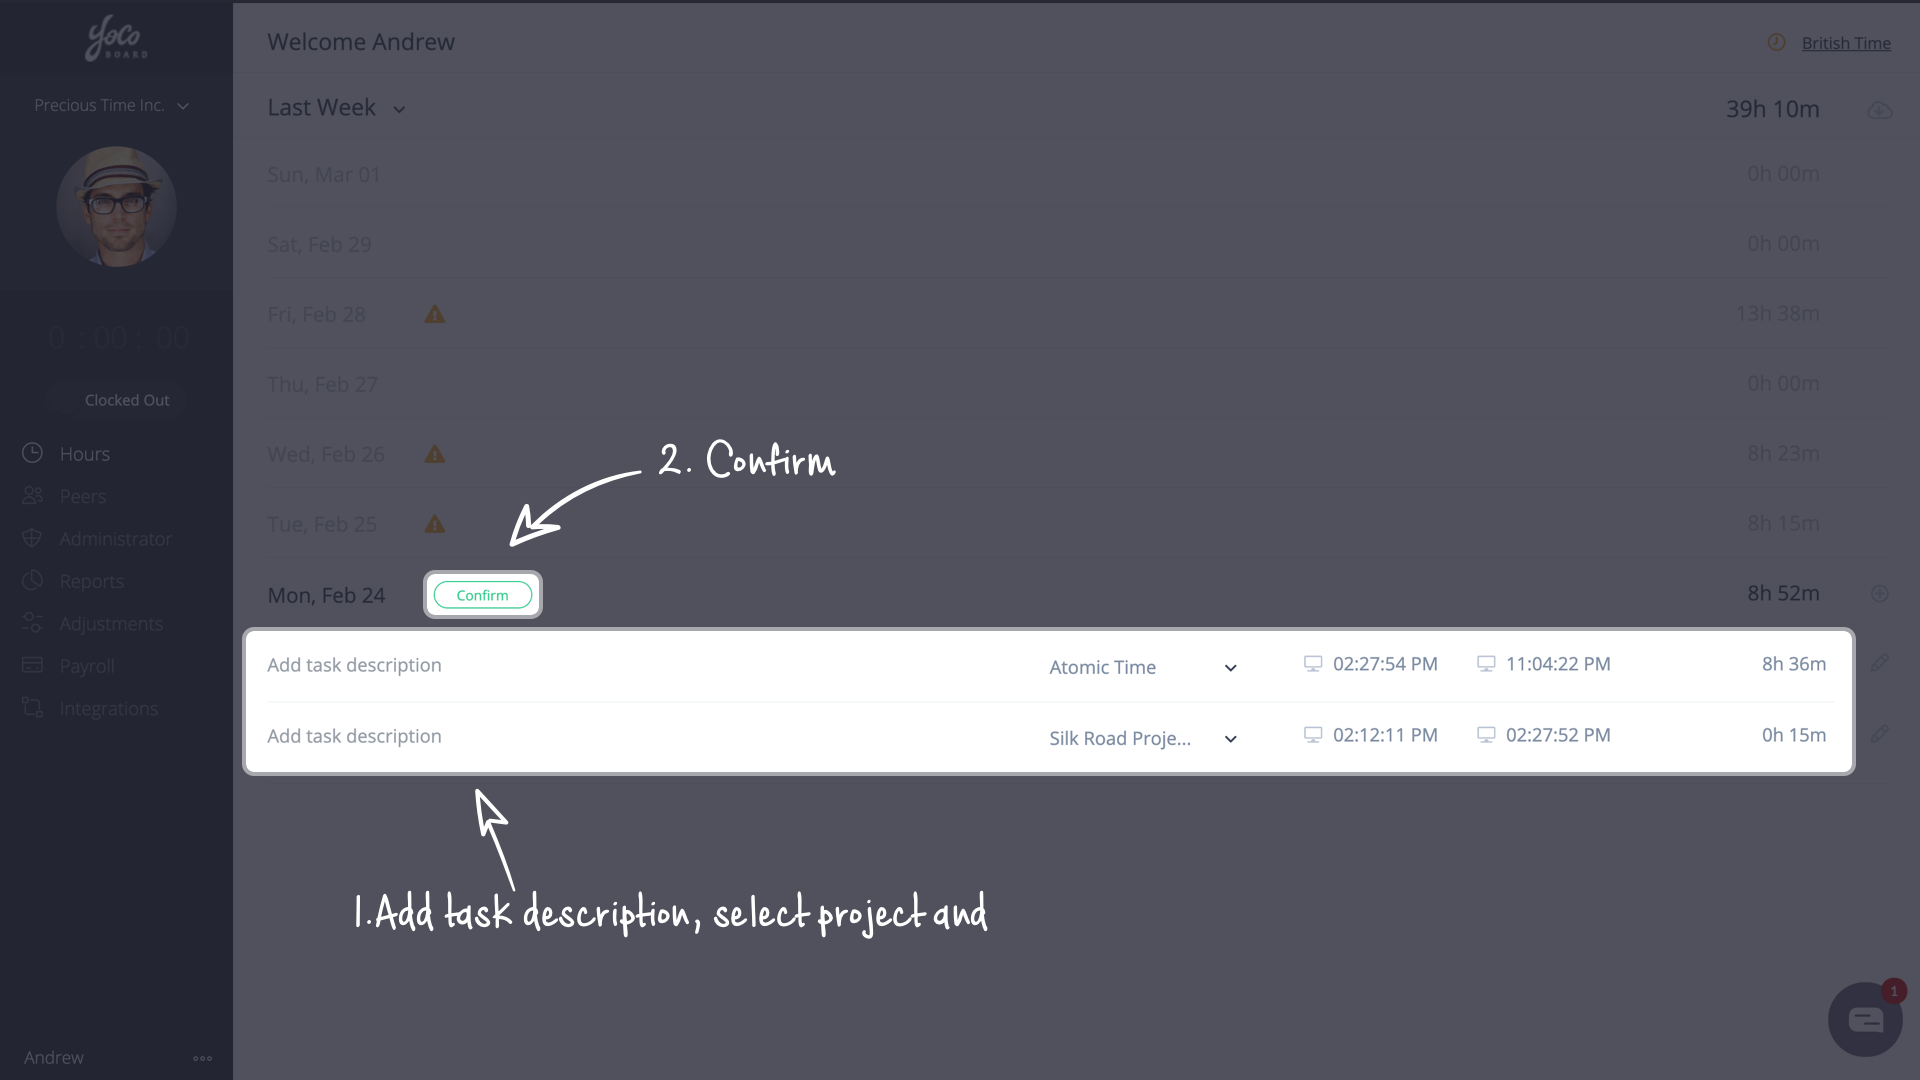
  • Click on the date containing the time entry to expand its details.
  • If there are unconfirmed entries from an earlier date, you will see the Confirm Your Hours warning pop up. Click on Take me there to confirm those entries.
  • Add a task description, associate that time entry to any of your projects (optional) and click Confirm.
  • Click Confirm on the confirmation pop up as well to complete the process.
Posted in: Confirm Time Entries, Hours

Place an Adjustment Request

April 1, 2020 12:56 am / Leave a Comment / YoCoBoard Admin

Modify or Add Time Entry

There may be instances where recorded time entries need to be modified. For instance, you may have missed to clock in or clock out. Such scenarios can be easily managed by placing an adjustment request.  An adjustment request can be placed to modify an existing time entry or to add a new time entry replacing an existing time entry.

Note: Adjustment requests need to be placed before confirming hours. An Admin or Super Admin can accept, modify or reject an adjustment request..

1.1 Modifying a time entry

  • On the YoCoBoard sidebar, click Hours and click on the date to expand its details. Click the Edit icon next to the time entry. 
  • On the popup, enter the relevant time entries and ensure the correct project is chosen. Provide a description of the adjustment for the Admin to review and click Save to place the adjustment.
    Note:  

    1. The Auto approve option is only available for adjustments requests placed by Super Admin and Admins. When ticked, the adjustment is automatically approved.
    2. When a staff member places an adjustment request, the request has to be approved by Super Admin or Admin. 

1.2 Adding a new session

  • On the YoCoBoard sidebar, click Hours and click the date to expand its details. Click the Add (+) icon next to the time entry to add a missed session. 
Posted in: Basics, Hours, Time Adjustment

Change Time Zone

February 27, 2020 5:35 pm / Leave a Comment / YoCoBoard Admin

Auto-Detect & Manual Setting

While tracking time, it is important that your profile is configured to the geographical time zone of your area. This simplifies the way you track time especially if you are part of a distributed team or if you work for clients from another region. YoCoBoard auto-detects time zone based on your location and updates accordingly. You can also manually select a time zone from the list.

In addition to that, your clients can view your clocked-in sessions in their local time (Admin feature).

1.1 Choosing a time zone manually

  • Click the time zone on the top-right corner of your YoCoBoard dashboard. 
  • On the pop-up window, select Pick from the list, choose your time zone and click Update. 

Note: If the time zone you select, doesn’t match the auto-detected time zone, a time zone mismatch icon appears on the app top bar. You may: 

  • Click the icon and update to the system detected time or you can ignore the warning. 

Posted in: Basics, General Settings, Hours

Clock In & Clock Out

February 27, 2020 2:51 am / Leave a Comment / YoCoBoard Admin

Tracking Work Hours

YoCoBoard makes time tracking easy with its one-click tracking. The single-click tracking starts with the web app and is also incorporated into integrations like Slack, Trello, Asana and also to the YoCoBoard Chrome extension.

1.1 How to clock in & clock out

  • On the YoCoBoard sidebar, click the toggle bar to clock in. 
  • When clocked in, the button turns green and the timer will actively record your session.
  • To clock out, click the active toggle button. The button will grey out and the time will stop, indicating that a session is over. 

Posted in: Getting Started, Hours, Quick Start Guide

How to edit a time entry

July 1, 2017 3:30 am / Leave a Comment / YoCoBoard Admin

Sometime you need to edit a time entry, whether you created it by clocking in and out with the button or created it manually.

To edit an existing time entry, start on the Hours page.

Click the pencil icon on the right side of the line you want to edit.

In the window that pops up, you’ll see the info for the entry as it stands now. You can change the start time, end time, project or any other field you see there.

When you’ve entered the updated information, click Save.

In the gif below, we’ll see how to change the clock-out time for an existing entry and add a description for the change.


Posted in: Hours

How to add a time entry

July 1, 2017 3:21 am / Leave a Comment / YoCoBoard Admin

Sometimes, you might need to add a time entry manually rather than clocking in and out. For example, may be you forgot to clock in one day.

To add a time entry, select the day for which you need to add the entry.

Click the plus icon, at the right side of that day’s line.

In the window that pops up, add the start and end times for the entry, the project you worked on, and a description.

Click Save.

Your entry will show as Pending. The administrator of your account will review and approve the entry to make it official.

how-to-add-a-time-entry

Posted in: Hours

How to see your hours

July 1, 2017 3:09 am / Leave a Comment / YoCoBoard Admin

The hours you’ve spent clocked in on YoCoBoard are displayed on the Hours page.

There you’ll see your hours for the current week by default, but you can also check the previous week, the current month, or any custom date range you choose.

Each entry is displayed on its own line, and is independently editable. In addition you’ll see the total time for each day.

So, you might see an entry for four hours you worked in the morning, and another entry for another four hours you worked in the afternoon.

how-to-see-your-hours

Posted in: Hours

Recent Posts

  • The YoCoBoard Firefox Add-on
  • View & Generate Reports
  • Manage Adjustment Requests
  • Change Staff Skill-set
  • Change Staff to Admin

Categories

  • Account Settings (3)
  • Admin (11)
  • Asana (1)
  • Basics (8)
  • Browser Extension (1)
  • Client (1)
  • Companies (1)
  • Confirm Time Entries (1)
  • General Settings (5)
  • Getting Started (2)
  • Hours (7)
  • Integrations (5)
  • Payroll (1)
  • Peers (2)
  • Projects (5)
  • Projects Association (2)
  • Quick Start Guide (4)
  • Reports (2)
  • Settings (6)
  • Slack (1)
  • Staff (10)
  • Team (4)
  • Time Adjustment (3)
  • Trello (1)
  • Zapier (1)
© Copyright 2025 - YoCoBoard - Support
Infinity Theme by DesignCoral / WordPress